You can manage your Quatrix® cloud files and folders on the File Explorer tab.
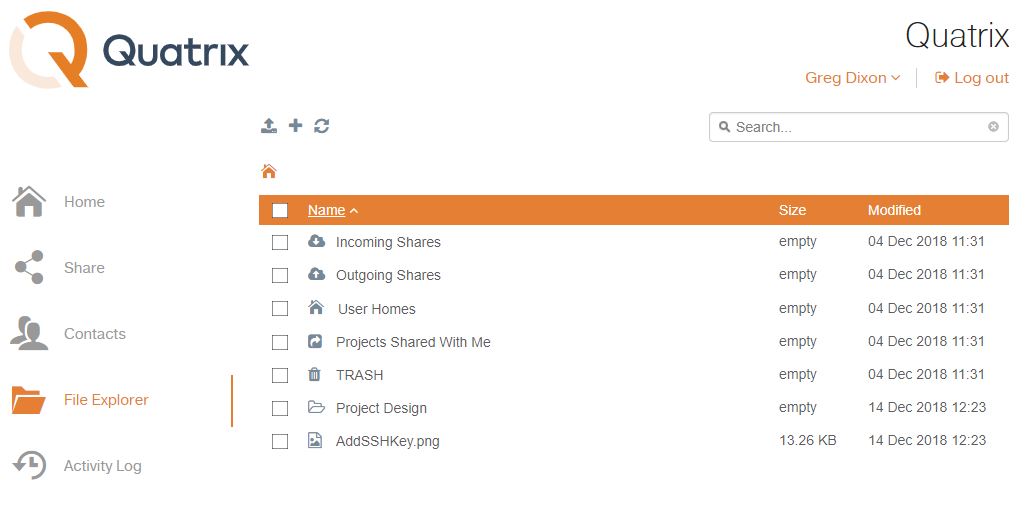
All files and folders contain icons before their names and are organised in the following way:
- System folders are always displayed in the same order and cannot be deleted:
- Incoming Shares - contains all your received files.
- Outgoing Shares - accessible to the admin only and contains all files and folders of your users.
- Projects Shared With Me - contains folders that your Quatrix users shared you.
- TRASH - contains all deleted files.
- Project folders - folders that you shared with your Quatrix users.
- Folders
- Files
- Encrypted files
If you would like to rename, delete, copy, move, or preview file(s), tick the check boxes for one or more files and choose the desired action from the top menu or right-click menu.
Besides own files and folders the administrator can see User homes folder of their users which is empty by default. The administrator cannot delete files and folders from the User Homes folder. This is possible only when the admin deletes the user. |
If you need to refresh the file listing, click the Refresh icon.
File Management
Uploading Files
You can upload files to your Quatrix storage from your computer by clicking the Upload icon from the top menu which opens the Uploader window. You can add local files or folders by either clicking appropriate buttons or you can just drag-and-drop files/folders from your desktop to the Uploader.
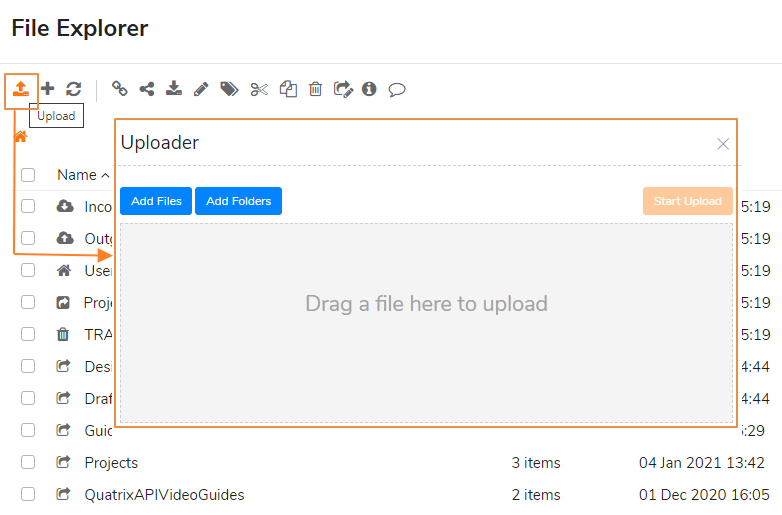
There are 2 types of file uploaders:
- Uploader
- Basic uploader
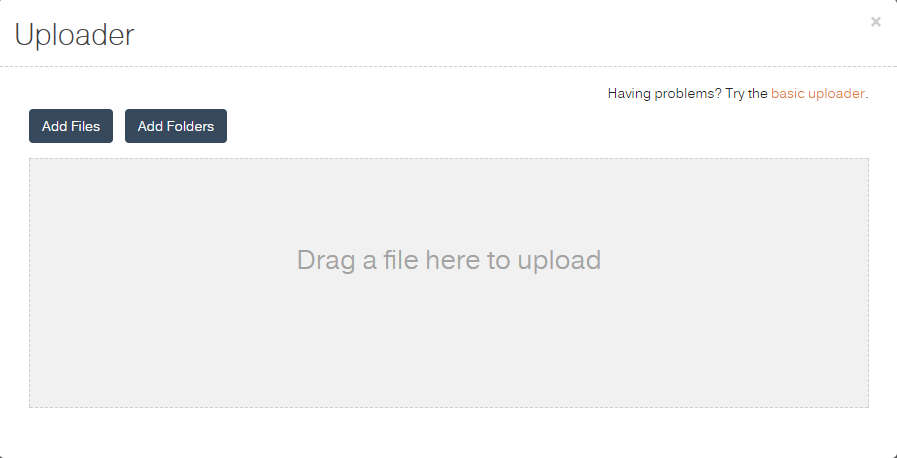
You can't upload the file more than 2 GB using Basic uploader. |
Sharing Files
To share files you should tick the check boxes for the files you wish to share and click the Share icon. This loads the Share form with the file listing populated with files you want to share. See more File Sharing.
Requesting Files
Quatrix is a great tool for acquiring files from your contacts or users with the assurance of security, detailed tracking and PGP encryption (if enabled for your account).
You can send a request for sharing files using the Share or Contacts tab.
To request files on the Share tab:
Select Recipient(s) can return files check box in the Optional Settings section (see the screenshot).
- Add, upload and share files. For more info see File Sharing.
- Your contact or user receives the email with the Return link to send files back to you.
To request files on the Contacts tab:
- Select the contact or user you want to get files from and click on the Request icon from the above menu (see the screenshot).
Type in the message and click on the Create button. The link to return files will be generated and displayed at the top right of your account.
Click on the Copy link button on the notification and share it as you wish.
If you would like to send the request by email, tick the Notify by email check box. While creating the file request you can specify the destination folder for your returned files by clicking on the Incoming Shares link. If you haven't found the folder you want to store returned files, create the new one there.
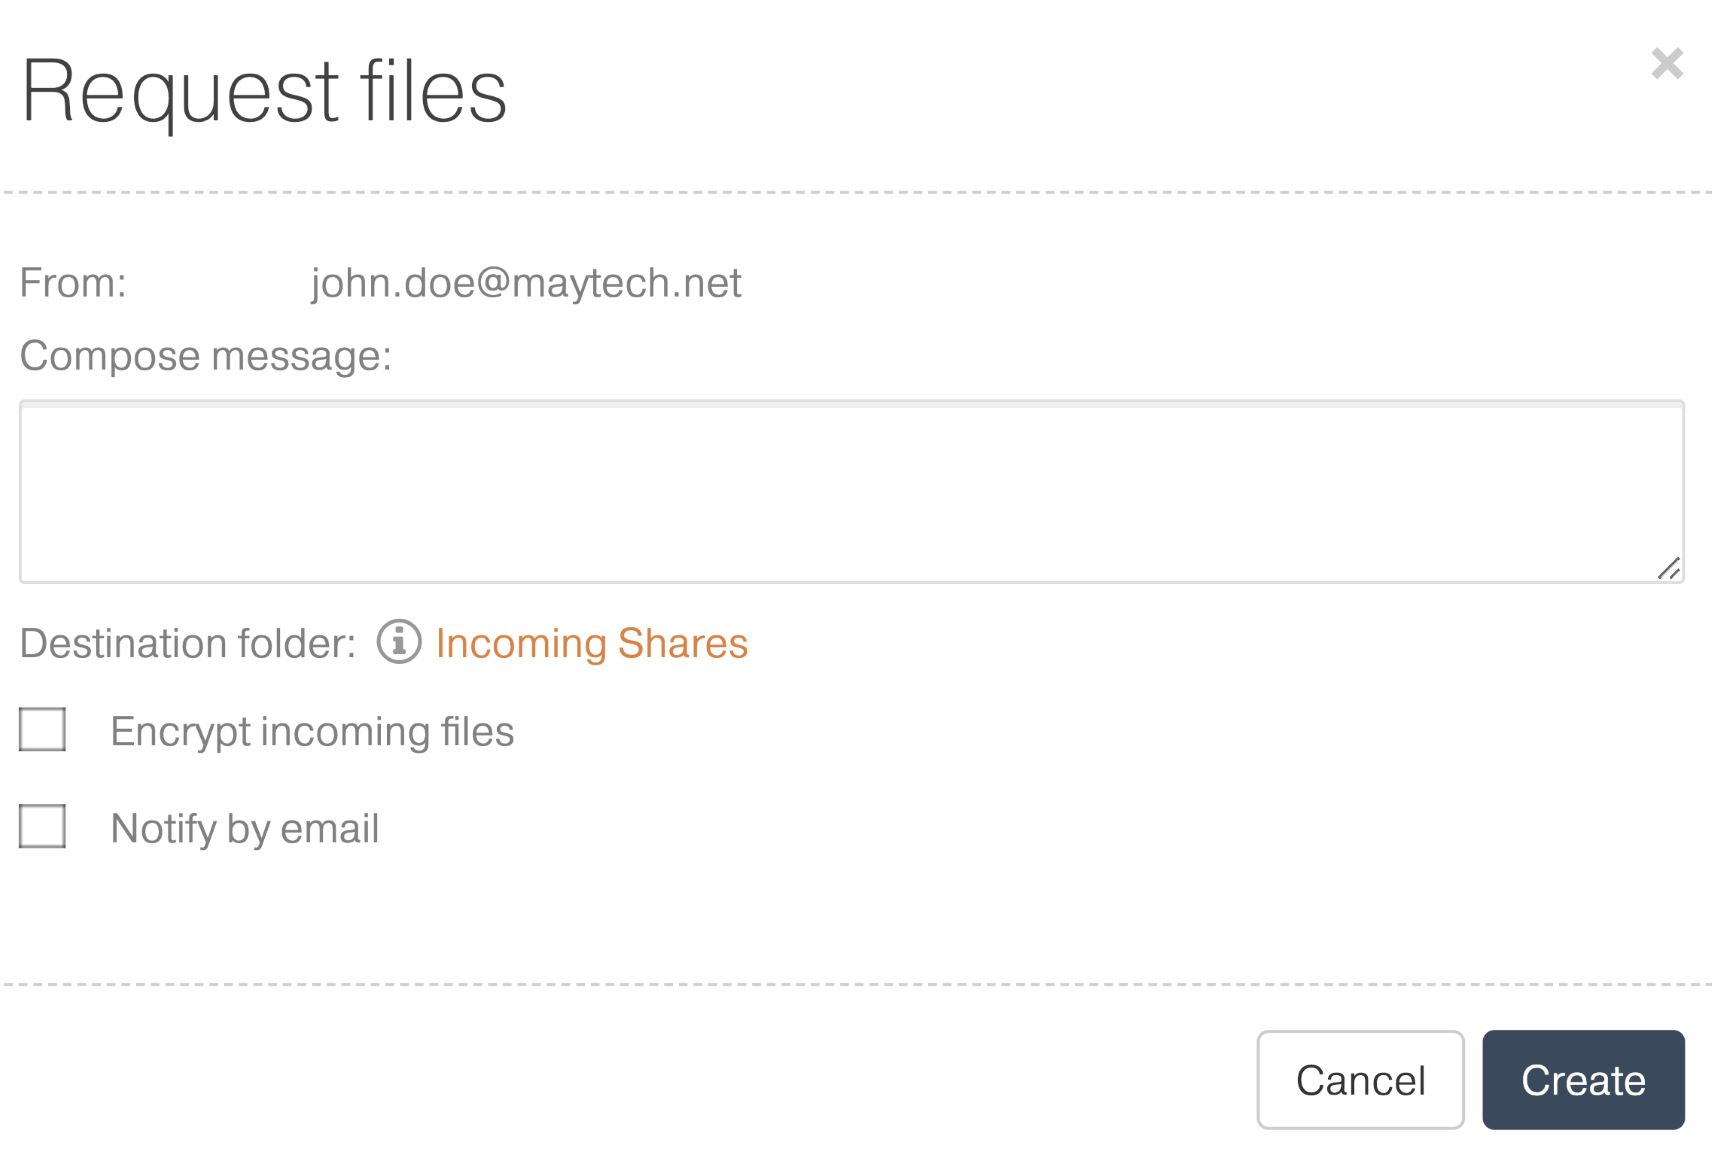
Please note that users who receive requests should register or use an existing Quatrix account to return files. |
The links uniquely point to a form to securely send files to you. Your contacts/users cannot edit the recipient address so the facility cannot be misused for general file sharing.
If PGP is enabled for your account you can ensure that files shared to you are encrypted using your public key. The files are automatically encrypted as they are queued for upload and this requires no additional skills or actions from your contacts/users. See more PGP.
As soon as your contact/user uploads files you will receive an email notification with the requested files.
Contacts can use request files links only once, as soon as some files were uploaded, the link will expire! Contacts can't open Request files links after 14 days! You have to either send the request at least every 2 weeks or convert your contact to paid Quatrix user. There is no expiration set for paid users and links are available forever. |
When you send requests, emails are sent individually to each recipient - the recipient list is hidden. |
Searching Files
You can search for files using the search box in the upper right. Files can be found based on the following properties:
- file name
- creation and modification date
- recipient and sender.
Folders allow files to be sorted into groups (e.g. junk, personal) to make storing and locating files easier.
Folder Management
Creating Folders
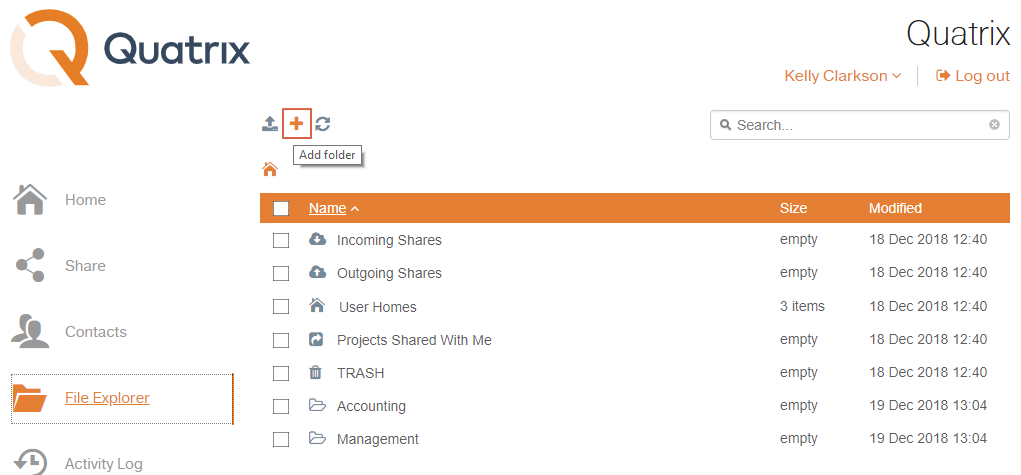
If you would like to create a new folder, follow these steps:
- Go to the File Explorer tab and click on the Plus icon from the top menu.
- Specify the folder name on the Create Folder window and save it.
Renaming Folders
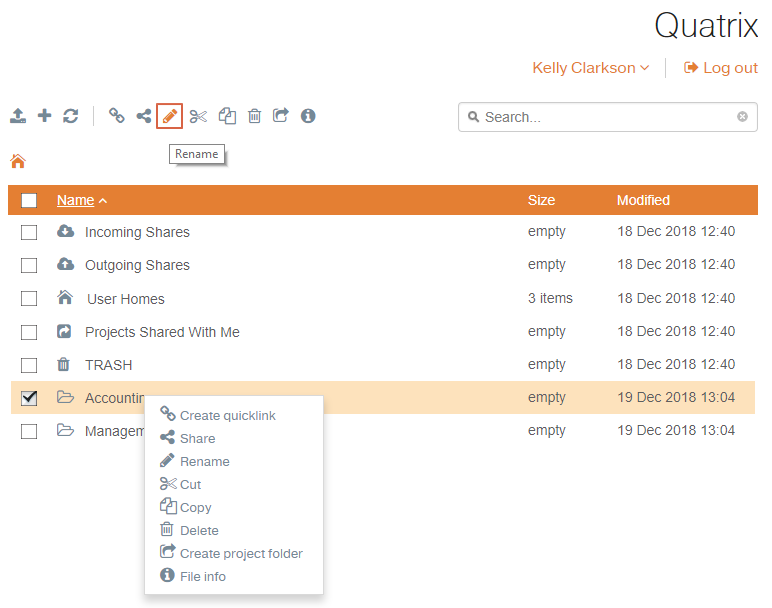
The folder name can be easily changed by ticking the check box next to the folder and selecting an appropriate icon from the top menu or by right-clicking on the folder and selecting the Rename option from menu.
Deleting Folders
If you need to delete the folder, tick the check box next to it and either click on the Delete icon from the top menu, or select an appropriate option form the right-click menu. All your deleted folders are moved to Trash and are stored there for 30 days.
If you delete the folder, its containing sub-folders will be deleted as well. |
To restore the deleted folder, go to the Trash folder, tick the appropriate folder and select the Cut or Copy options. Then go to the place you would like to restore your folder and click on the Paste button form the top menu. If you restore the folder with containing sub-folders, the inner folder structure will be kept the same.
Reordering Folders
You can easily organise any structure of your folders that allows you to keep your files and folders organised. Nested folders generally make it easier to find specific files later, because you don’t have to sift through all your files at once.
To move your folder to a different location, follow these steps:
- Tick the check box next to the folder and select the Copy or Cut menu option.
- Select an appropriate location and click on the Paste option.
Converting Folders to Project Folders
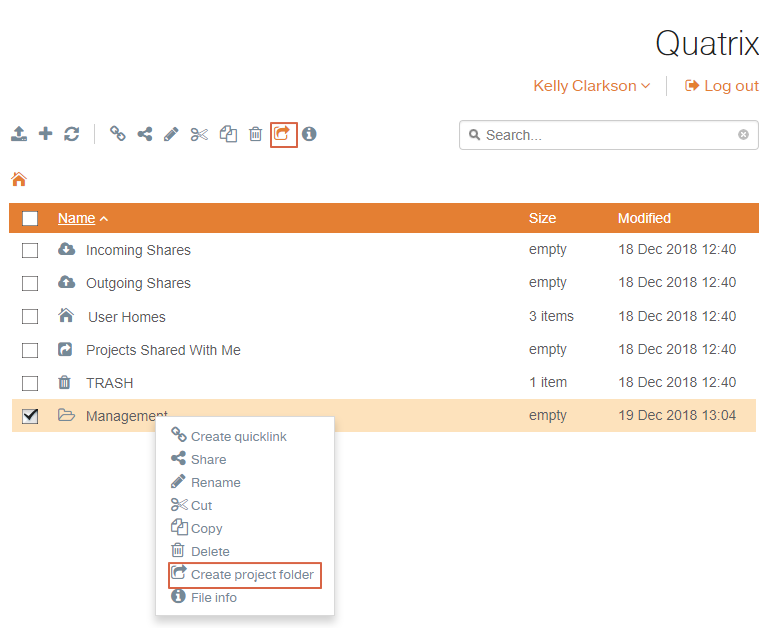
If you wish to share the folder with your users assigning them different permissions, convert your folder to a project folder by ticking the check box next to the folder and selecting the Create project folder option.
Project Folder Management
With Project Folders you can share folders with other users, granting list-only, list and read, read and write, full and share access to selected users.
Creating a Project Folder
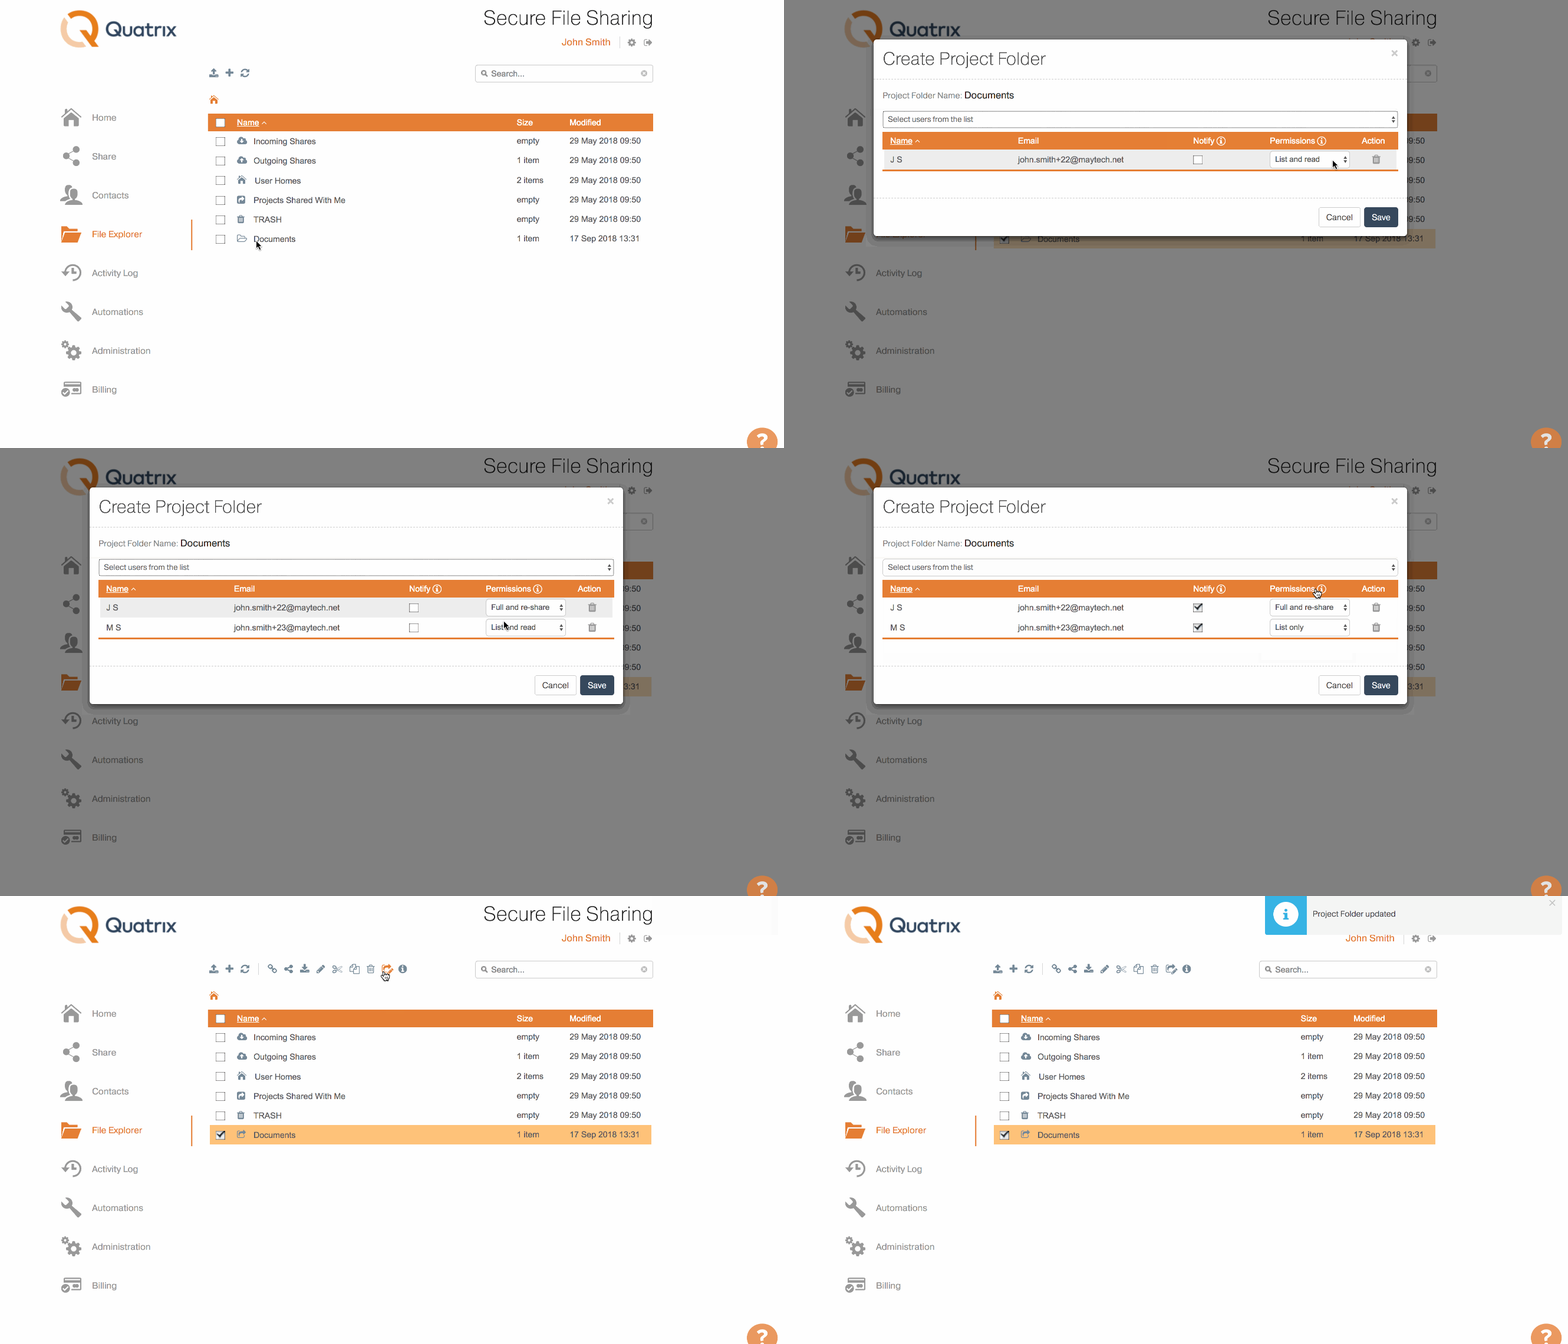
To create a project folder, follow these steps:
Click on the folder and select the Create a Project Folder icon from the menu.
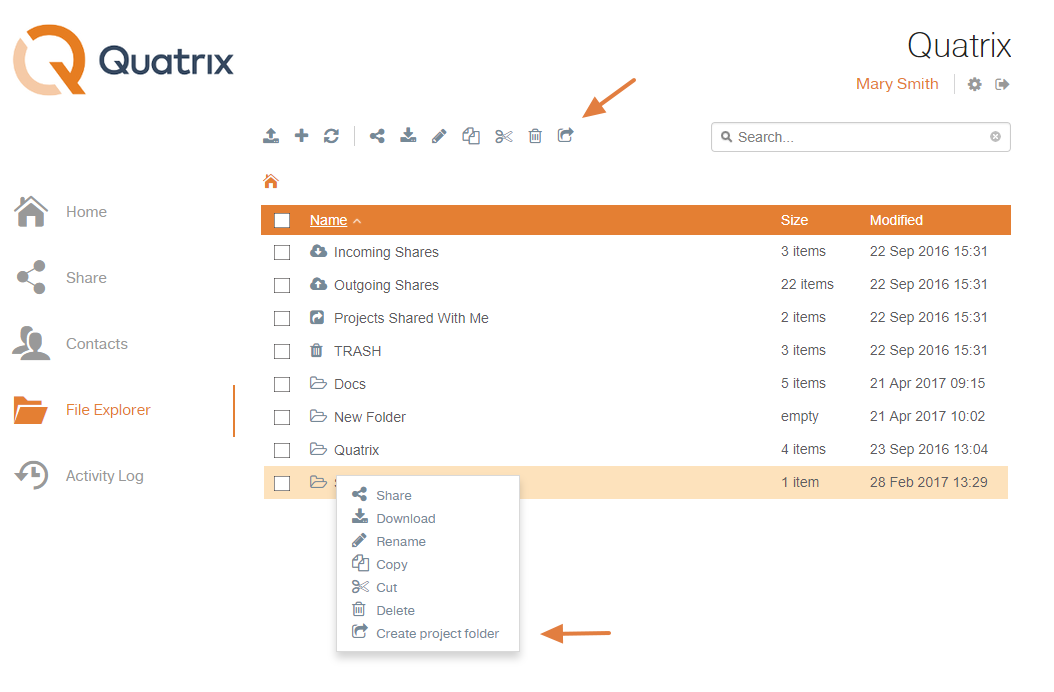
Select the user(s) you want to create a shared project with from the drop-down list, set the permission and tick the box to subscribe the user to upload notifications. To stay aware of changes (upload/rename actions) in the Shared Projects, you can turn on Projects Shared With Me notifications once you are creating or editing a Project Folder.
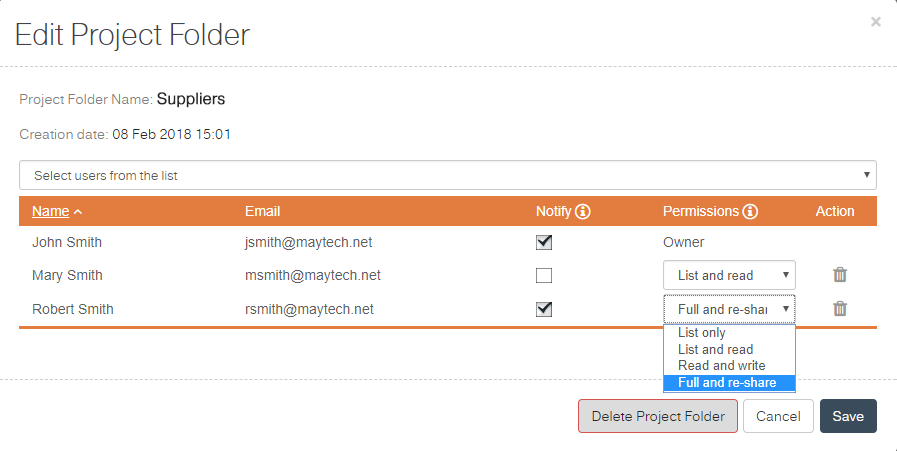
Every time a file is uploaded, renamed or deleted, all Project Folder users will receive email notifications, except the person who uploaded/renamed/deleted. Note, that notifications are sent on a user log out and only if you're using Project Folders via web. |
| List only | List and Read | Read and Write | Full and Share | |
|---|---|---|---|---|
| Permitted actions |
|
|
Plus:
|
Plus:
|
You can add as many users as you want to the project folder. |
3. Click Save to make your change take effect.
Folders that are presented in the Projects Shared With Me folder do not reduce user storage quota, only the quota of the account owner. |
Editing a Project Folder
If you want to add more users or change permissions, go through the following steps:
- Select the project folder and click the Edit Project folder icon from the top menu or right-click and select this option from the drop-down list.
- Change the user or permissions.
- Click the Save button to save all changes in the project folder.
To change the name of the project folder, select the folder and choose the Rename icon from the top menu. Your project folder will be renamed, but it will be displayed with the original name for other shared project folder users. |
Deleting a Project Folder
To delete a project folder, follow these steps:
- Select the project folder you want to delete.
- Click the Delete icon from the top menu or right-click and select this option from the drop-down list.
Confirm the deletion.
Your project folder will be deleted.
If you delete the project folder from the Edit Project Folder dialog, it won't be deleted but rather transformed to a regular folder and it won't be either visible or accessible to your users.