You can share files and folders inside Quatrix account using shared Project Folders. This allows you to easily collaborate with your users and take control of their actions within your shared folder.
The video below displays the basics of project folder management.

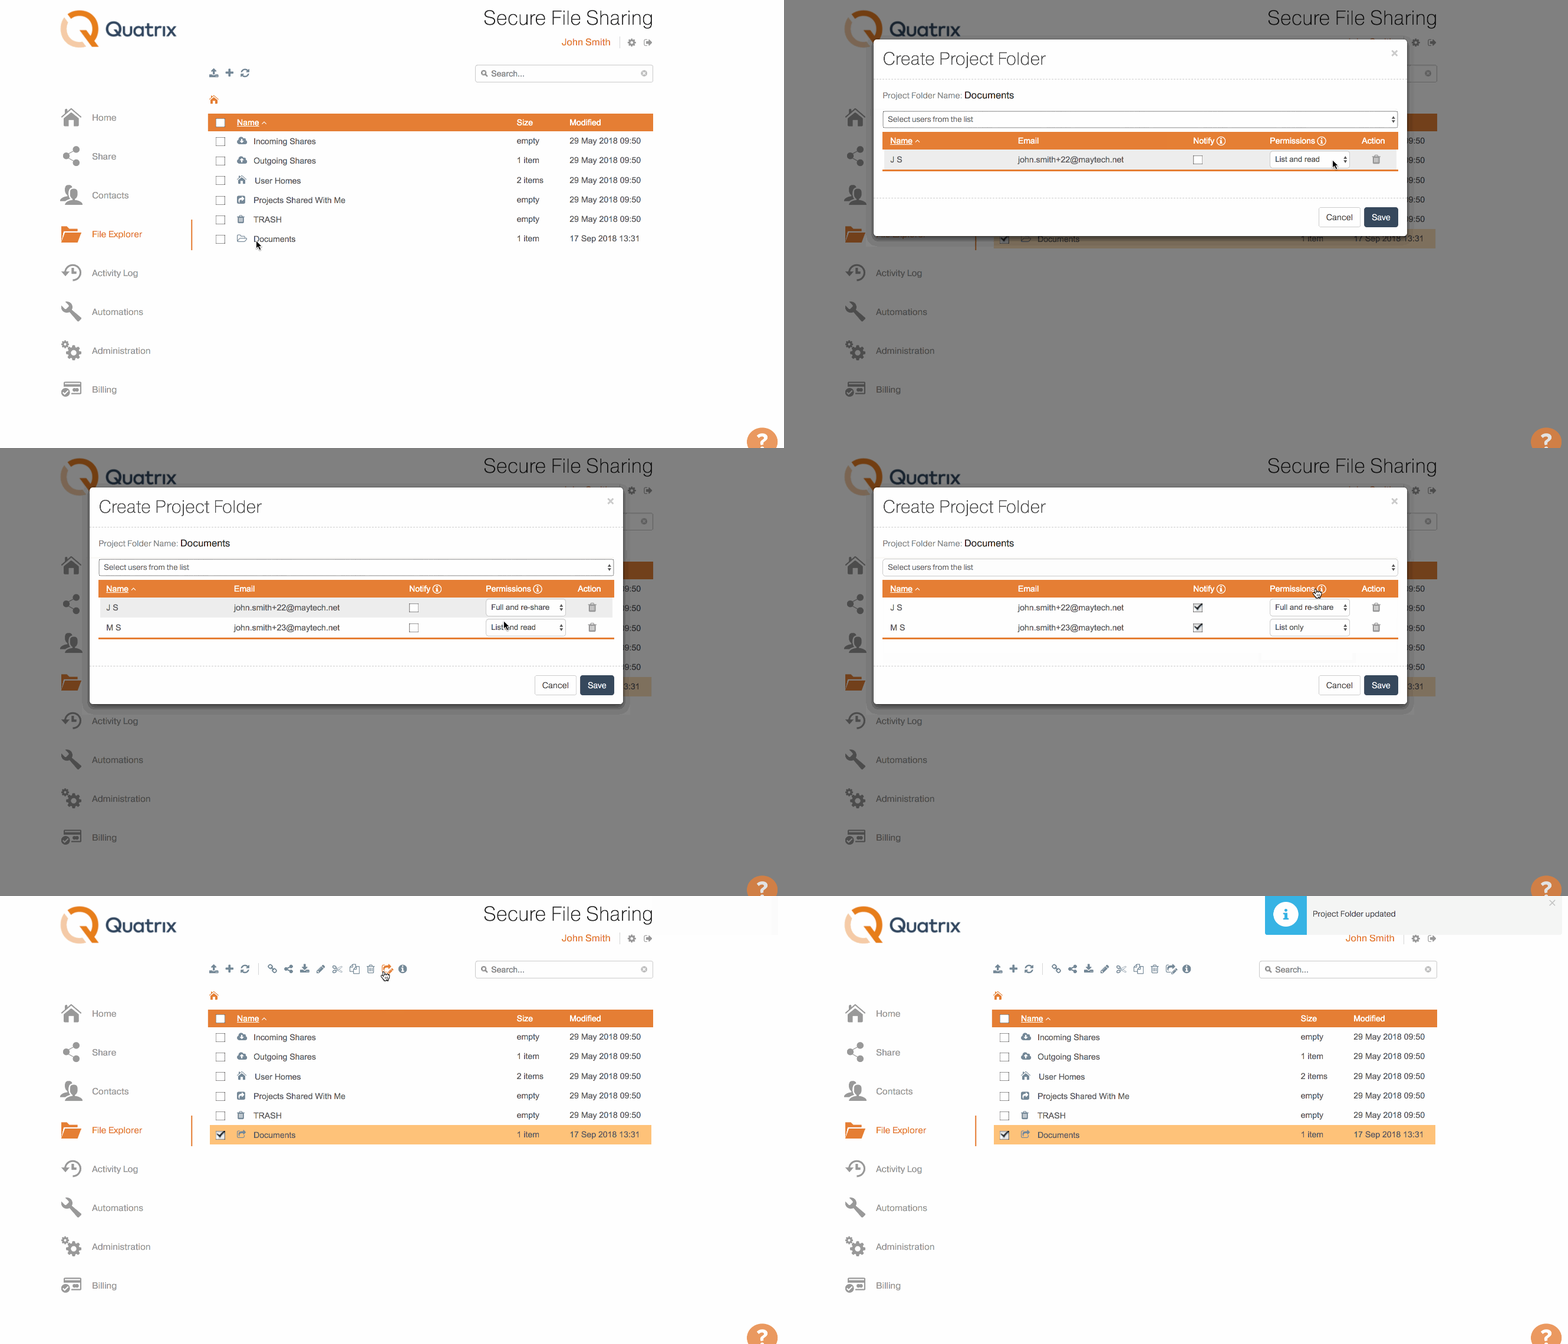
To create a project folder, follow these steps:
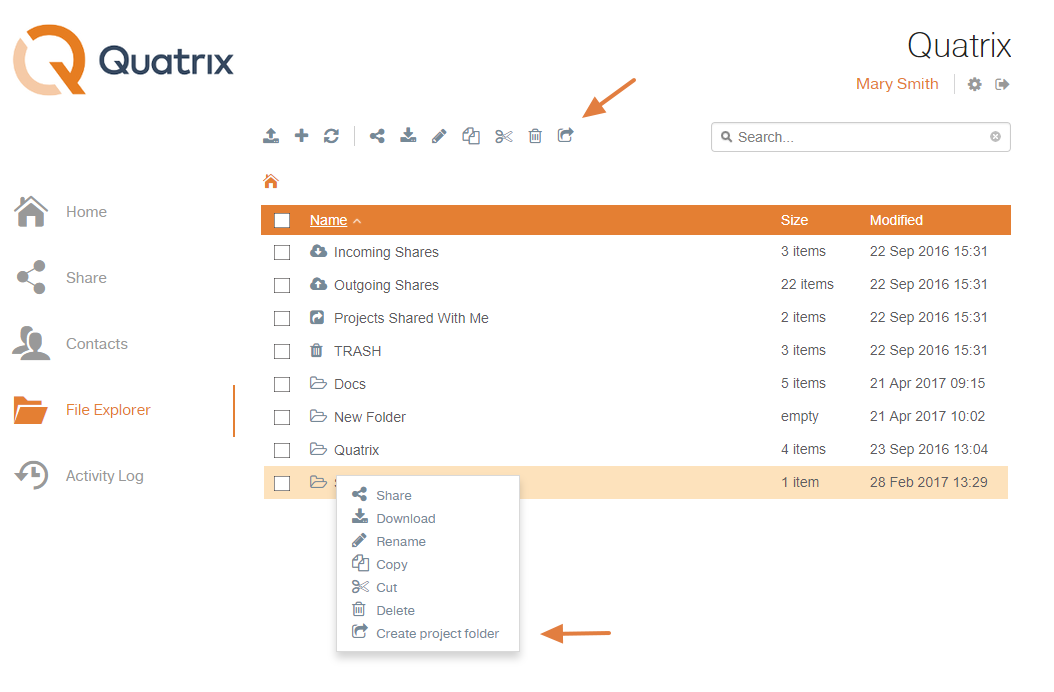
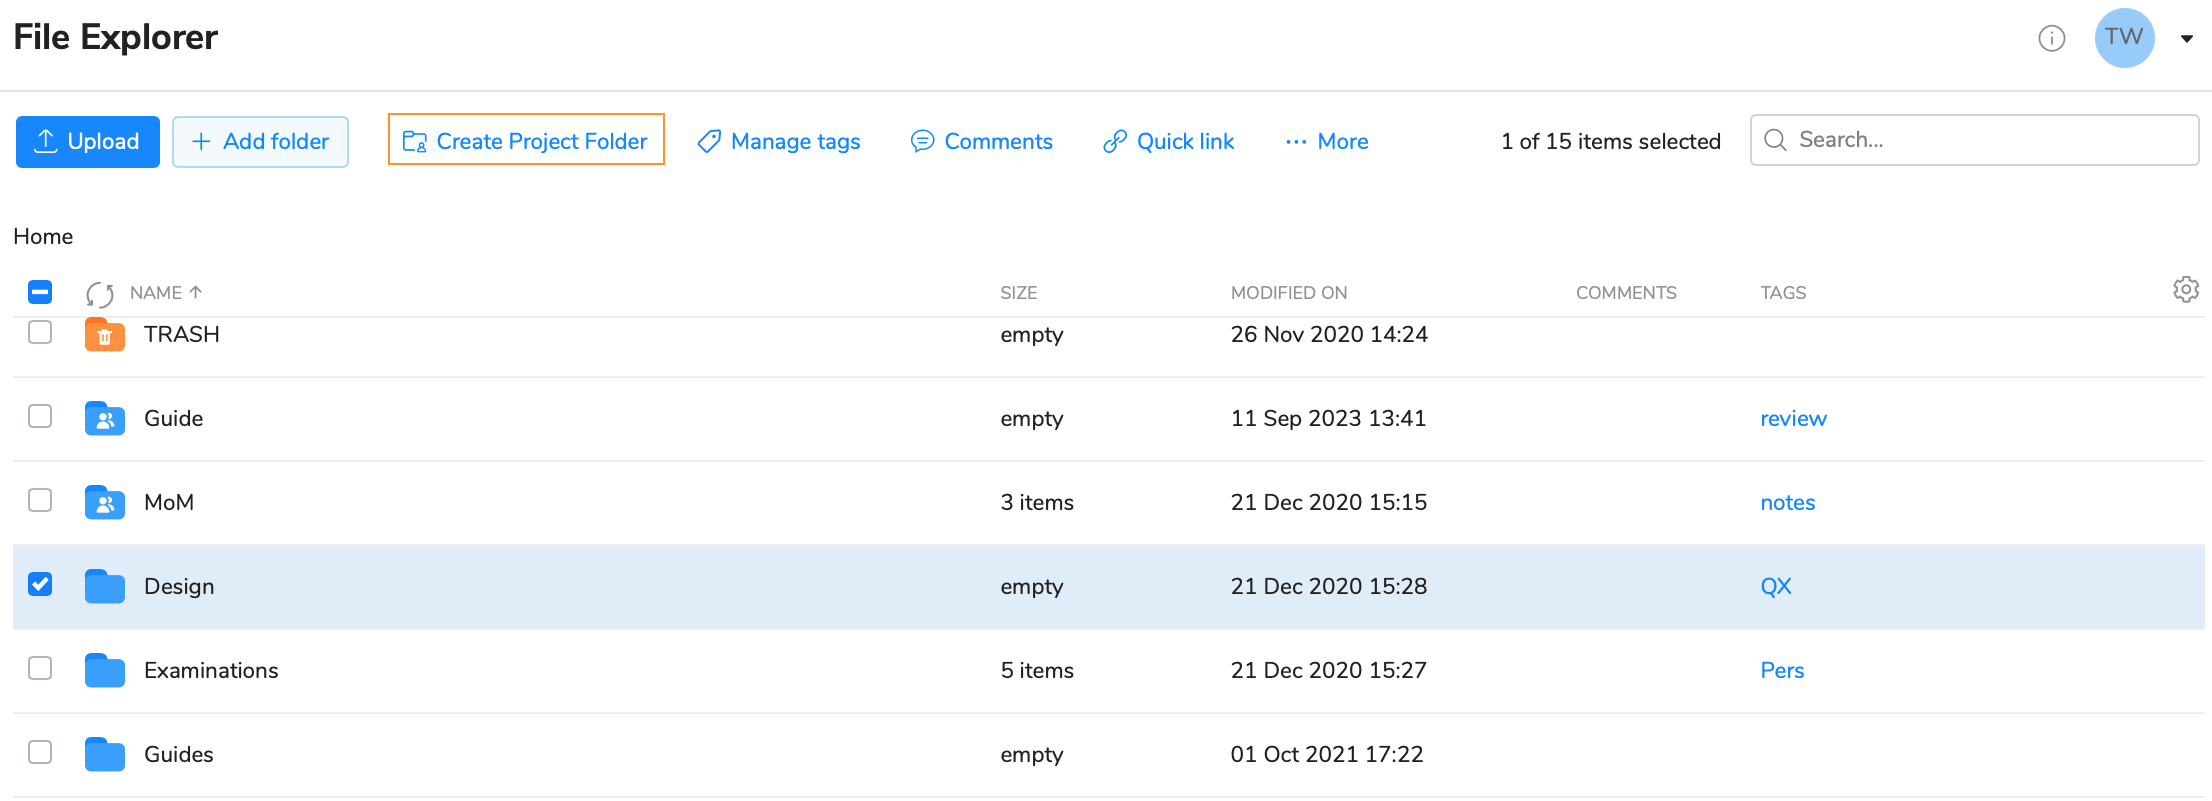
Click on the Create a Project Folder icon from the above menu or choose an appropriate option form the right-click menu.

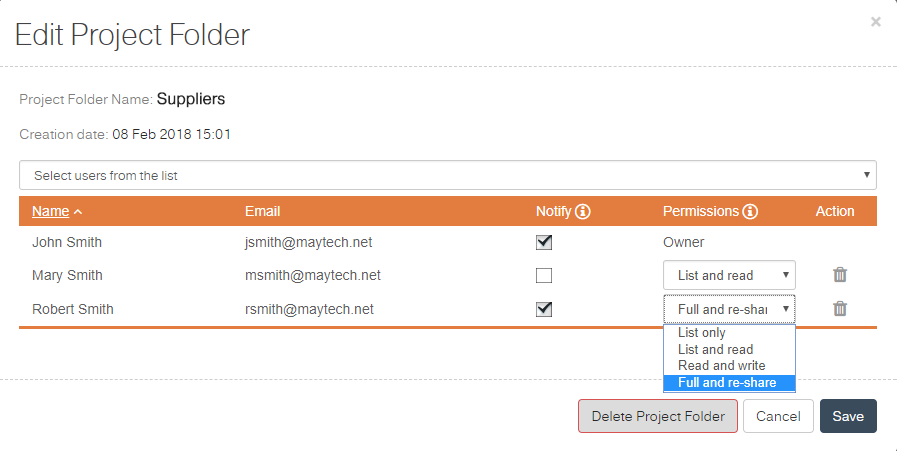
Select users from the list and specify their permissions. For details on permissions see the table below. Besides you can check the Notify box next to the user you would like to subscribe to upload notifications.  .
.
Click on the Save button.
As soon as your project folder is created, you will be notified and your users will get emails with details where to find the shared project folder. All your shared projects are stored in the Projects Shared With Me folder of your users.
| List only | List and Read | Read and Write | Full and Share | |
|---|---|---|---|---|
| Permitted actions |
|
|
Plus:
|
Plus:
|
Folders inside the Projects Shared With Me folder do not reduce user storage quota, only the quota of the project folder's owner. |
If you want to update users or change their permissions, go through the following steps:

To change the name of the project folder, go to the File Explorer tab, select the folder and choose the Rename icon from the top menu. Your project folder will be renamed, but it will be displayed with the original name for other shared project folder users.
Every time a file is uploaded, renamed or deleted, all Project Folder users will receive email notifications, except the person who uploaded/renamed/deleted. Note, that notifications are sent on a user log out and only if you're using Project Folders via web. |
Deleting a Project Folder
To delete a project folder, follow these steps:
Your project folder will be deleted.
If you delete the project folder from the Edit Project Folder dialog, it won't be deleted but rather transformed to a regular folder and it won't be either visible or accessible to your users. |