How to transfer files between Quatrix and SharePoint/OneDrive?
Adding a Remote Site
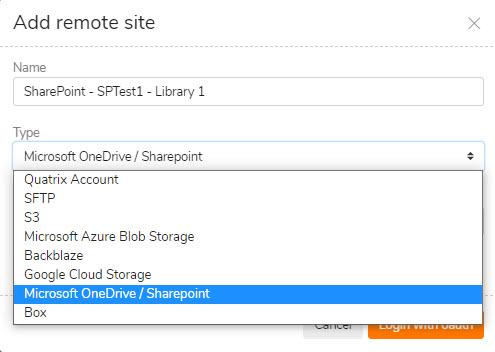
In the “Remote Sites” menu there is the option to choose Microsoft OneDrive/SharePoint as a remote site.
Determine whether you will connect to OneDrive or Sharepoint and use the “Name” field to help describe the connection. For example, you may wish to use the name field to note the Sharepoint “Site” you are connecting to, and the specific library or folders within the site.
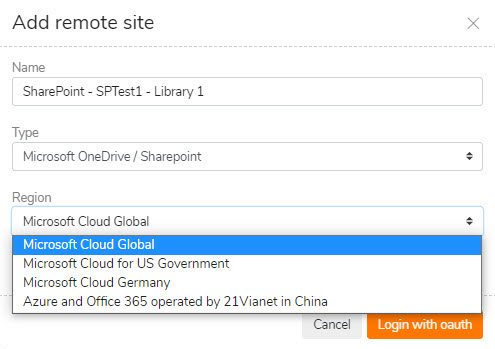
After selecting Microsoft OneDrive / SharePoint as the “Type” , then choose the region where your Microsoft 365 OneDrive or Sharepoint account reside.
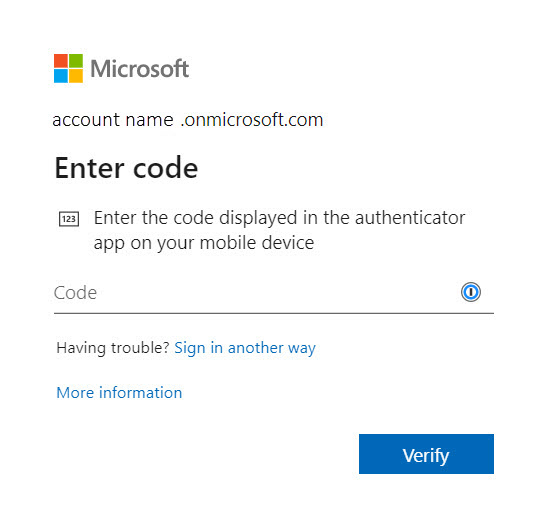
Once the fields have been populated, choose to “Login with Oauth”.
This should direct you to log into a Microsoft 365 account, unless already logged in.

Provide credentials to authenticate and gain access.

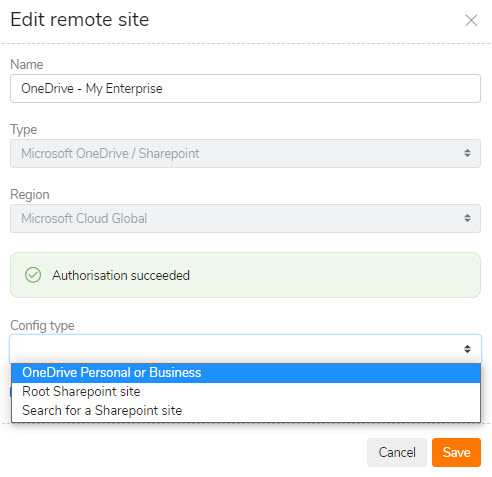
After successful linkage Quatrix will display an “Authorisation succeeded” message.
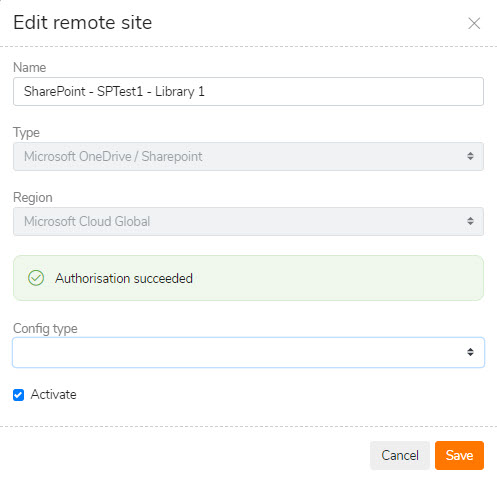
You should now choose whether you want to access your SharePoint or OneDrive service.
If the workflow you are planning on creating will be transferring files between a specific SharePoint site, then you can use the search capability to list the sites your Microsoft account has access to.
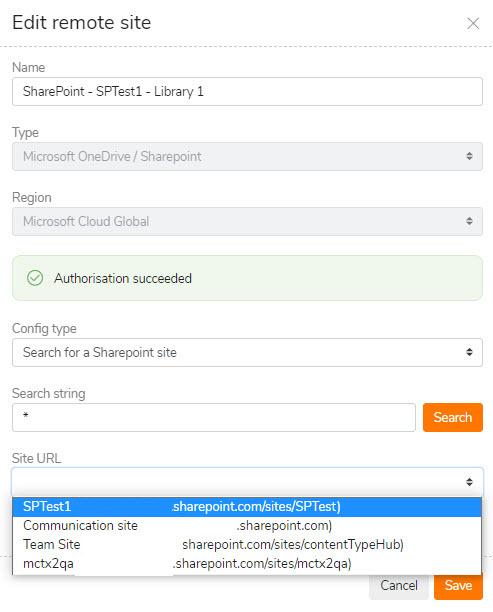
Once the list of SharePoint sites is displayed, and you have selected the desired site, you can then choose a specific library within the SharePoint site you wish to connect to. Use the Drive Id field to do this.
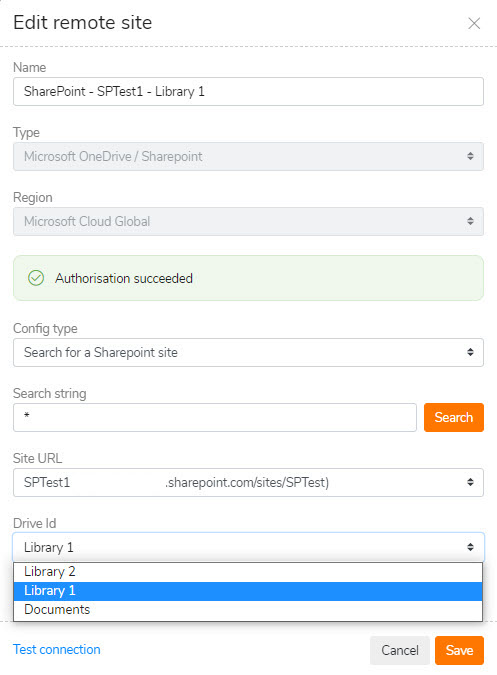
If there are specific folders within a Sharepoint library you wish to transfer files to or from, you can configure this path when you create the “External Workflow”. See an example later in this article.
After saving the configuration you can use the “Test connection” option to validate the connection.
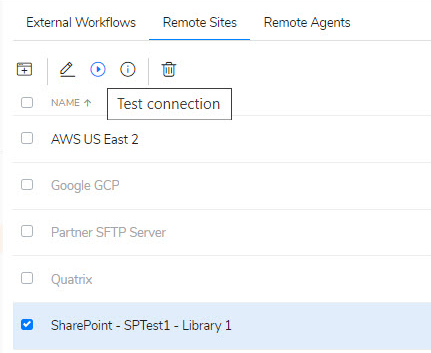

Now that you have created the “Remote Site” profiles for OneDrive or Sharepoint, you can create external Workflows to copy, move, or synchronize files between Quatrix and these repositories.
Creating a SharePoint Workflow
SharePoint Example Workflow
Let’s say that files are being deposited in a Sharepoint folder and we want to use Quatrix to pull the files from Sharepoint onto Quatrix storage. Maybe then we will combine another workflow and re-transfer to another target. In this sense Quatrix is a central broker providing an audit trail. We also want to leave the Sharepoint folder empty after a successful transfer. So in this example we will use the MOVE action.
SharePoint Note - ROOT SITE
SharePoint consists of different types of sites.
There is one site that is created out of the box once you create your Office 365 account, and that site is domainname.sharepoint.com. That site is called the Root Site. Essentially it is the site with the shortest URL (without /sites suffix). Root site is a must in each tenant and was created automatically for you when your organization acquired Office 365 account.
But as we have seen when setting up the Remote Site connection, Quatrix allows you to connect to specific SharePoint sites and libraries. And to transfer files to or from specific SharePoint folders within a library, you define the path within a Workflow as shown in the following steps.
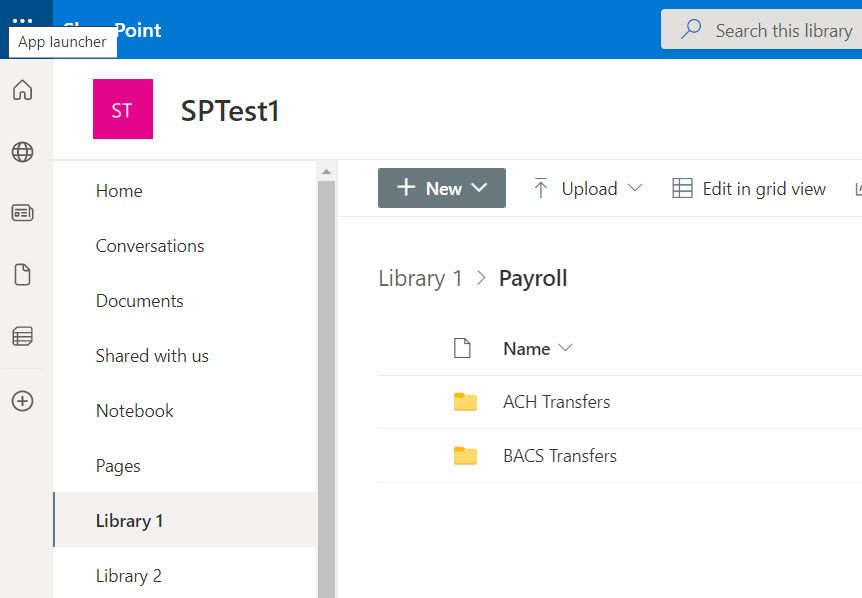
For this example we will use a connection to a Sharepoint site labeled SPTest1. Specifically we want to transfer files from a folder labeled “Payroll”. In this case there are subfolders within the Payroll folder that contain files we want to transfer as well.
Looking at the example SPTest1 site from the Microsoft Admin Center console, we see
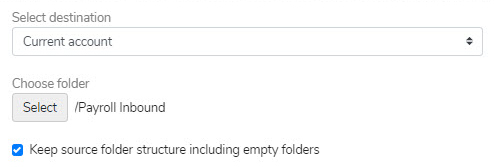
On the Quatrix side, you will need to determine a folder where the files will be transferred into. If none yet created for this task, use File Explorer, and create the desired folder. In this example flow, a folder has been created and named “Payroll Inbound”. This will be what we enter in the destination field as we create the workflow.
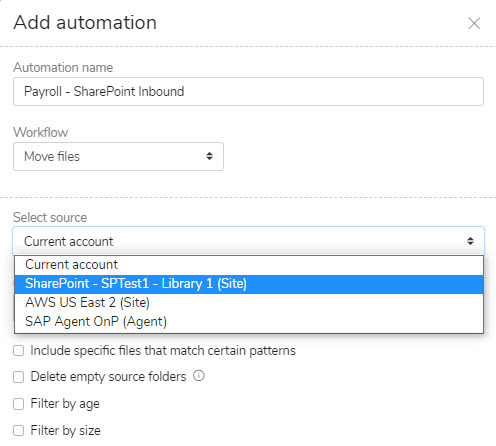
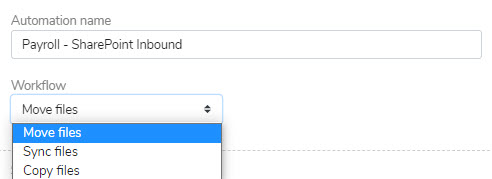
To create the actual workflow, navigate to the “External Workflows “menu in Quatrix. Click on the “Add Automation” Icon
Coming up with a naming convention for your workflows is very important. This will help with general organising and sorting in the future.
In this example we use a previously created “Remote Site” connection to the Sharepoint SPTest1 site and specifically to Library 1.
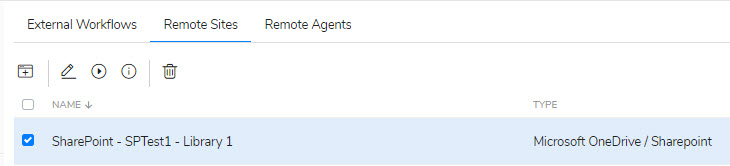
Previously established Remote Sites are automatically listed under the select source field dropdown menu.
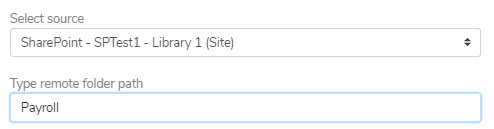
Because we have a specific folder called “Payroll” that exists within Library 1 on our SharePoint site, we’ll need to enter the folder name “Payroll” in the remote folder path field
For destination we select current account and use the browse select button to choose the appropriate folder we expect files to be transferred to.
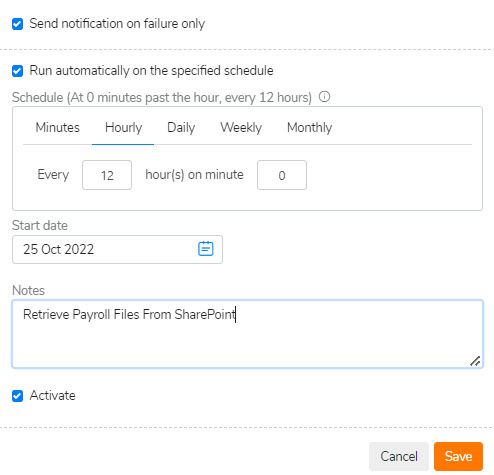
Once the fields are completed and you have defined the schedule when you want the workflow to run, you can run the rule manually to test if desired. Running a rule manually is an option and via the API you can also invoke a workflow.


Checking the destination folder on Quatrix we see the subfolders and files have been successfully pulled from the Sharepoint source.
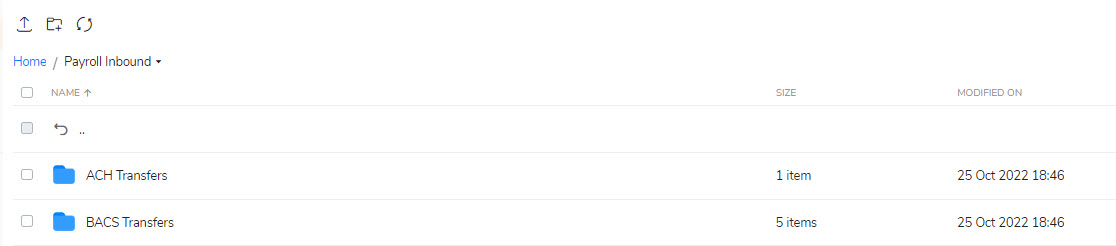
In this example our intent was to leave the Sharepoint folder empty after successful transfer. The “Move” action was used to achieve this.
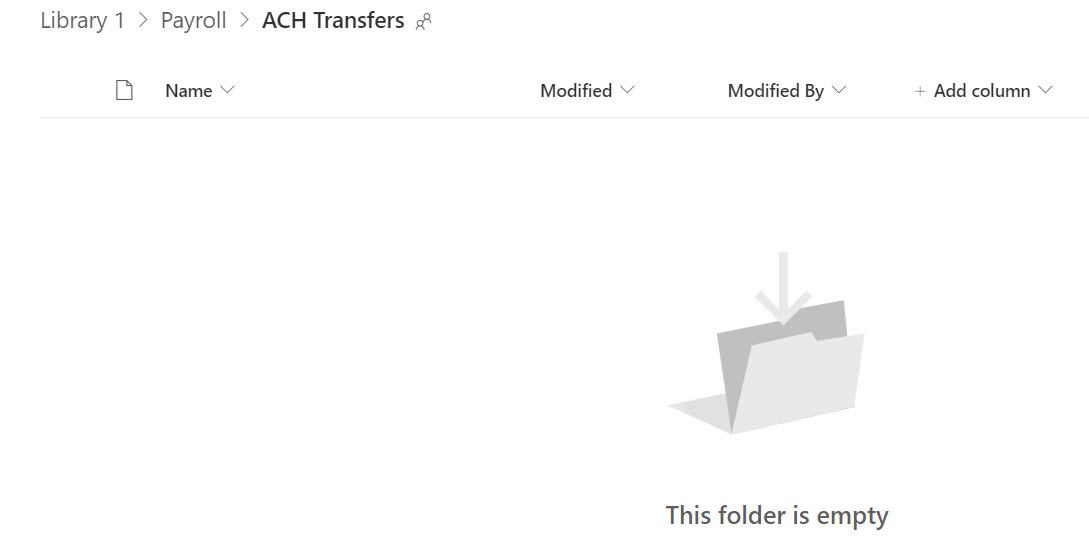
Checking the Sharepoint site we see the source folders are empty as expected.
OneDrive Remote Site Creation
To set up a OneDrive workflow in Quatrix, first create the remote site connection.
Best practice is to name the “Remote Site” so it’s easily identifiable as to the connection type.
Similar to establishing a SharePoint connection, choose “Microsoft OneDrive / Sharepoint” as the type and choose the appropriate region.

After logging in with Oauth, you should get an authorization succeeded message if successful. Now choose OneDrive Personal or Business as the config type.
Save the configuration. Test and validate the connection.

OneDrive Example Workflow
Let’s say that files are being deposited in a OneDrive folder that need to be automatically transferred to Quatrix. And we want to leave the OneDrive folder empty after a successful transfer. So, in this example we will use the MOVE action.
On the Quatrix side, you will need to determine a folder where the files will be transferred into. If none yet created for this task, use File Explorer, and create the desired folder.
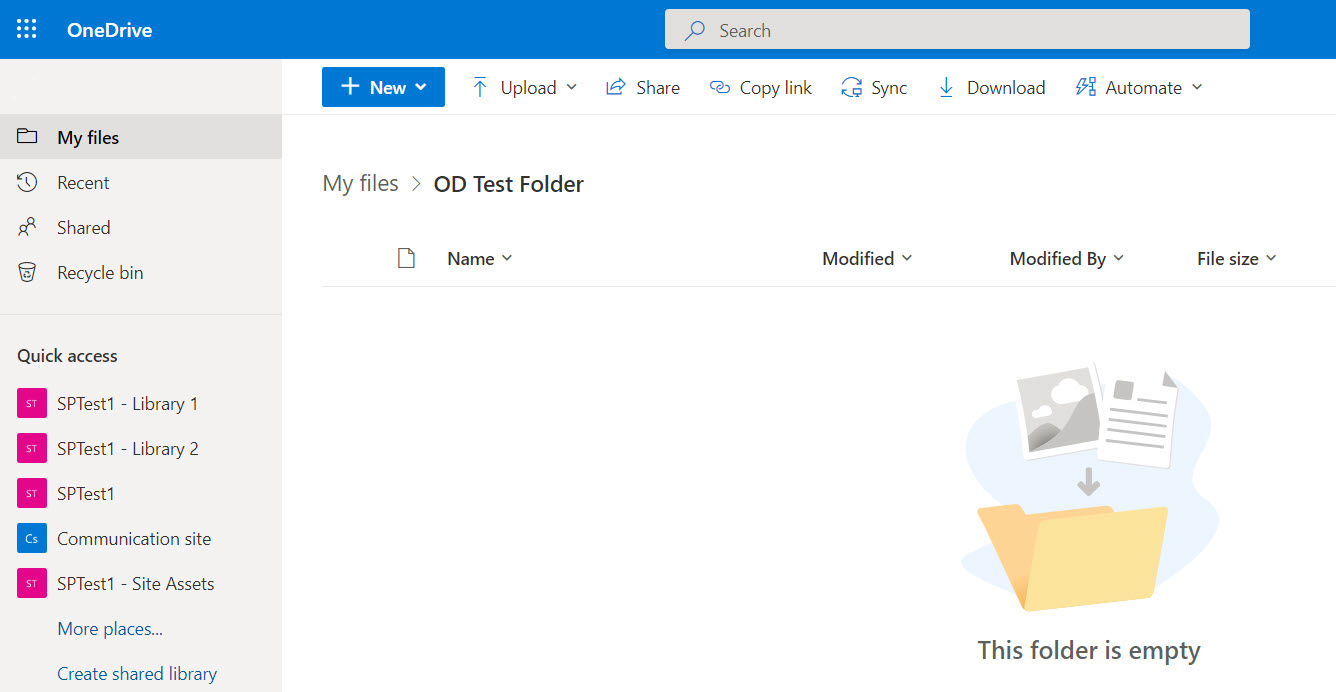
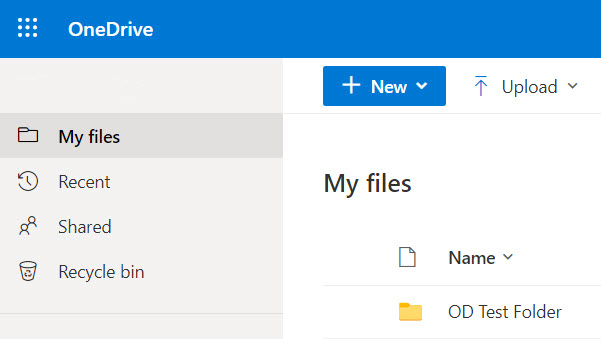
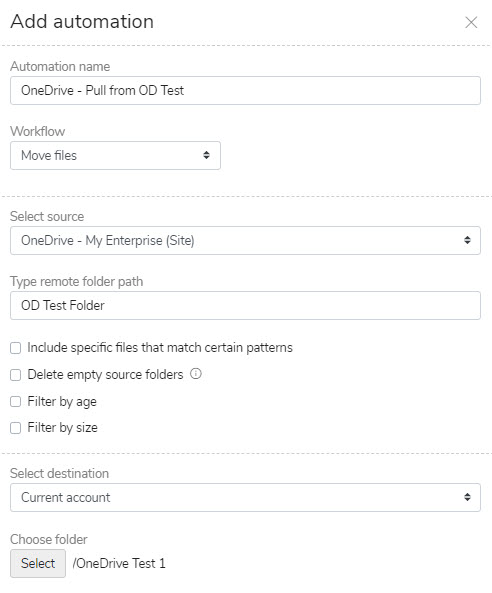
We look at the OneDrive side of things and will be using a folder named “OD Test Folder”. We see some csv files in the folder.
The source remote folder path is entered as OD Test Folder.
Once the fields are completed you can choose to run the rule manually (best practice to test) or wait until the scheduler you defined initiates the transfer.
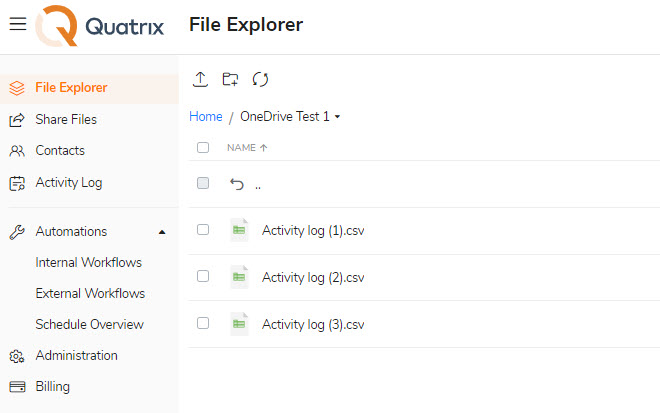
After running the workflow, we see a successful transfer of files into the destination folder.
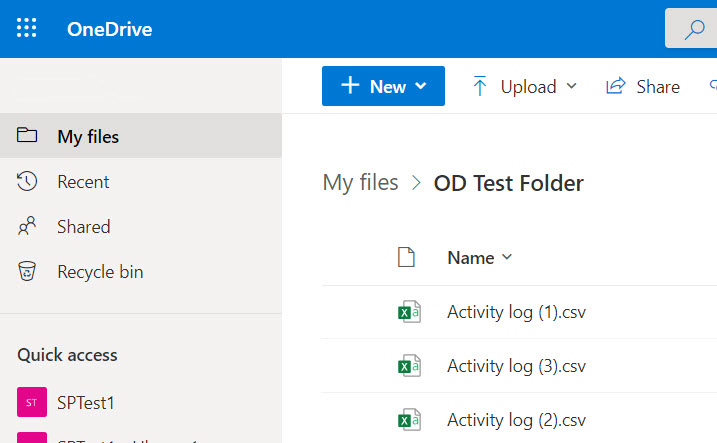
And we see the OneDrive folder is now empty which is what was expected.