SSO with Azure AD
Our step-by-step guide below will explain how to configure single sign-on between your Quatrix application and Azure AD as the identity provider (IdP).
Prerequisites
In order to enable SSO for your organisation, you need the following items:
- A valid subscription to Azure AD. Being your IdP, Azure handles the login process and provides credentials of your users to Quatrix.
- Owner or administrator role in your Quatrix account.
The integration requires the following steps:
- Add your Quatrix app to Azure AD
- Configure Azure AD details in Quatrix
- Configure Quatrix app in Azure AD
- Add users to Azure AD
- Test SSO
Add your Quatrix app to Azure AD
Before configuring single sign-on you need to add your Quatrix application to Azure AD (i.e. a create a non-gallery application in Azure portal) and enable SAML SSO. Consequently, you will get a generated Metadata URL that you can use to connect two applications.
You need to be an administrator in Microsoft Azure AD to complete the steps below.
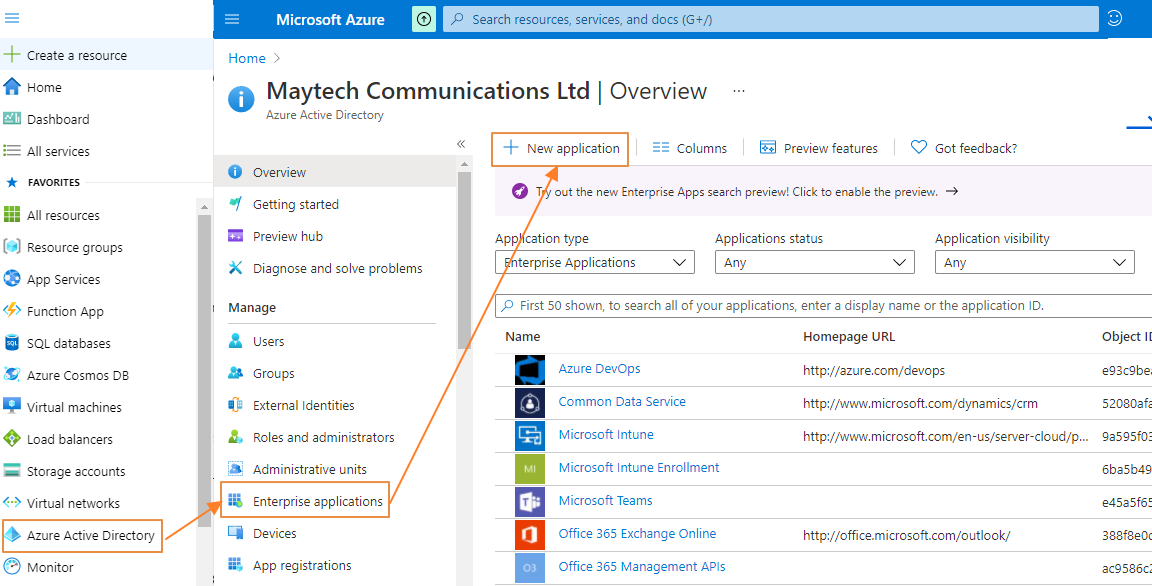
Log in to your Azure portal, go to Azure Active Directory → Enterprise applications and click on + New application from the top menu.
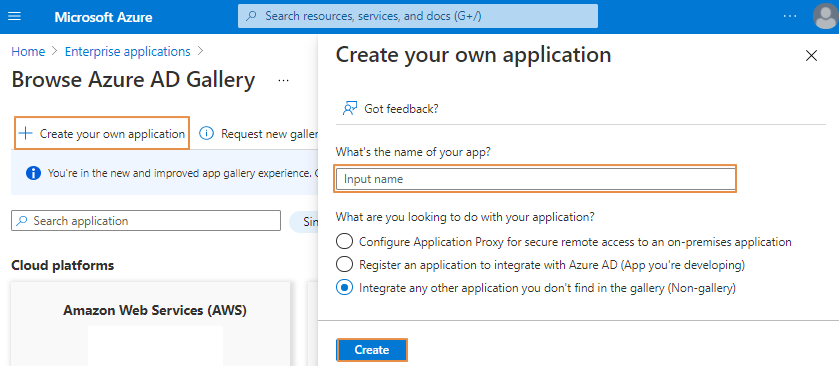
- Click on + Create your own application, type in the name of your application, select Integrate any other application you don't find in the gallery (Non-gallery) and click on Create.
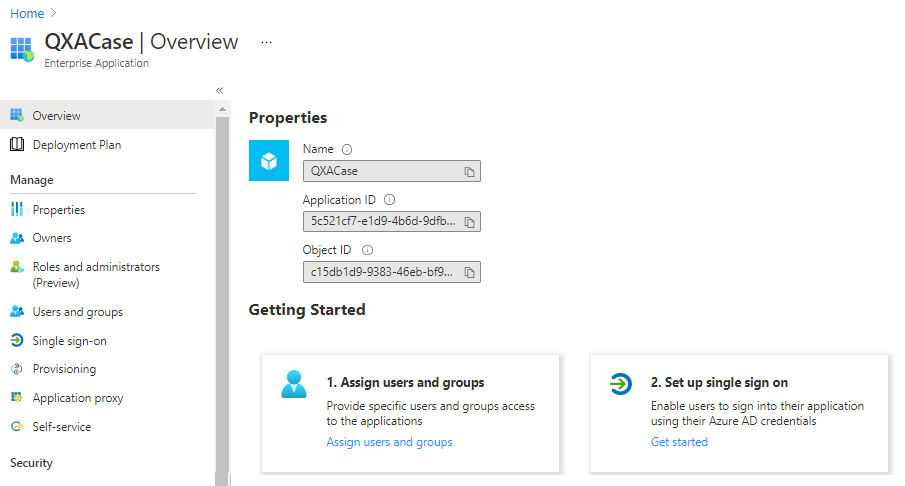
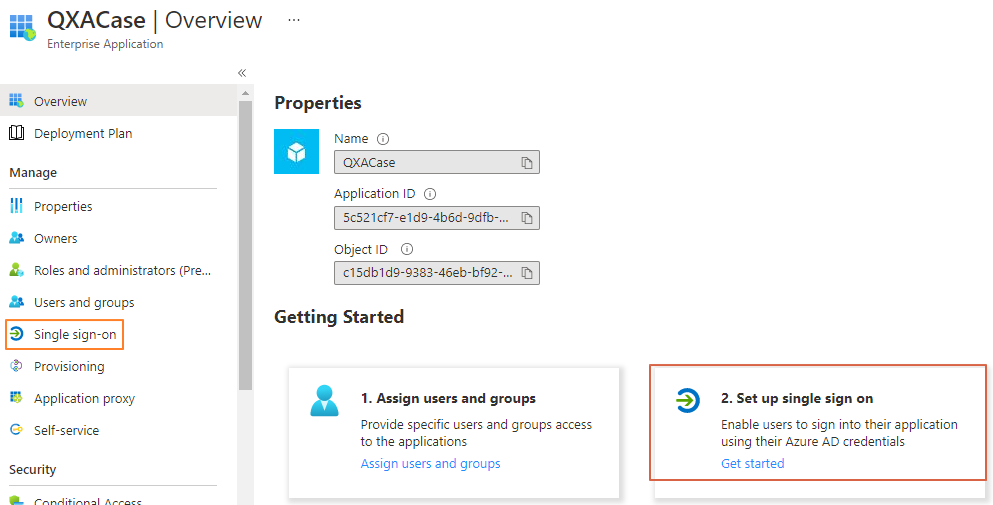
- This will lead you to the Overview page where you can find details of your application.
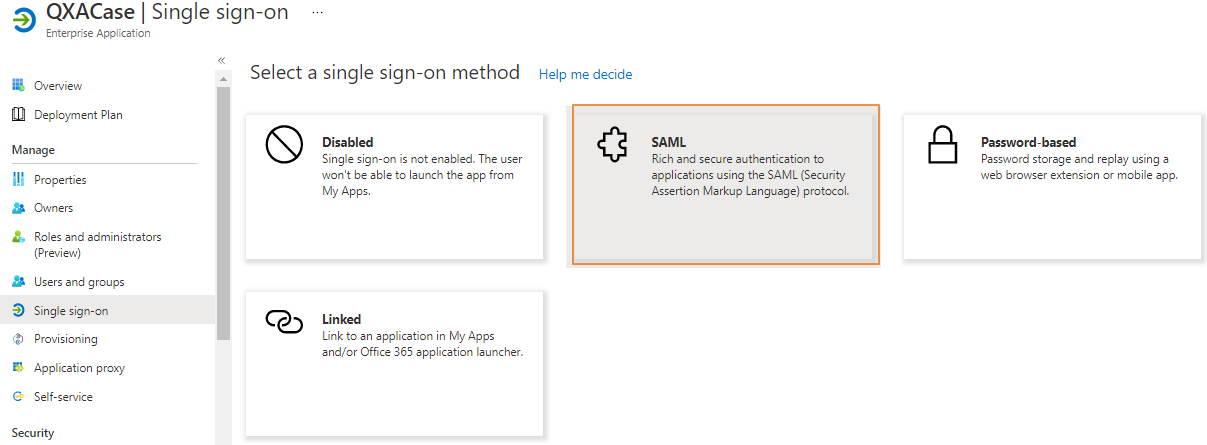
- On the Single sign-on configuration page select SAML mode as a single sign-on method.
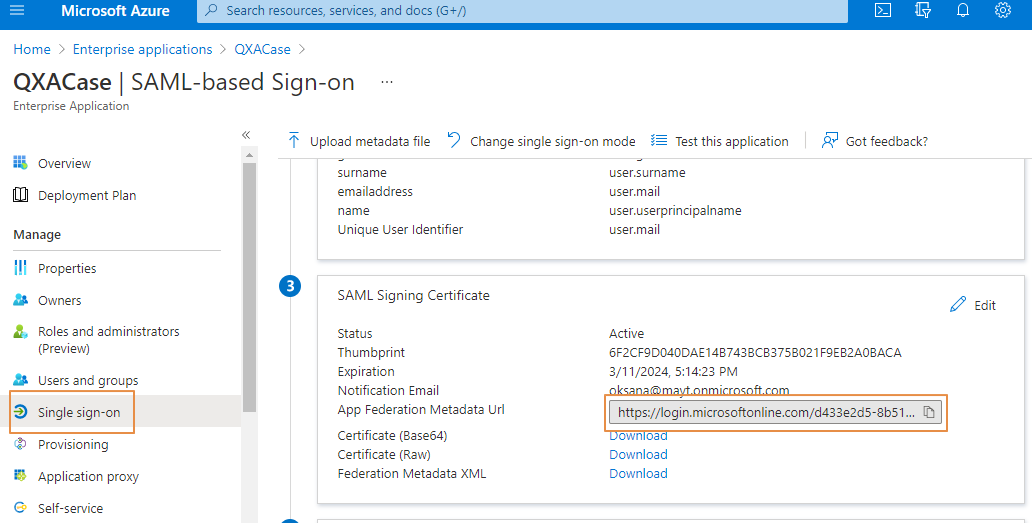
- This opens the page for setting up SSO with SAML. Go to SAML Signing Certificate section and copy App Federation Metadata URL.
Configure Azure AD details in Quatrix
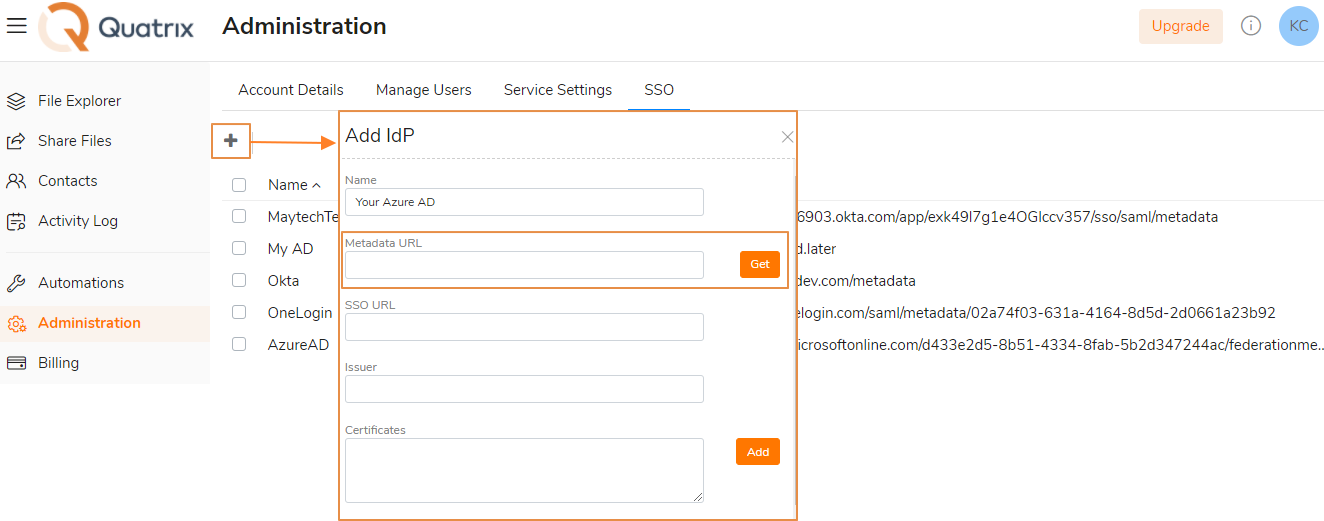
- Log in to your Quatrix account and go to Administration → SSO sub-tab.
Click on + Add SSO button, type in the name of your identity provider and paste the Metadata URL which you have copied from the SAML Signing Certificate section in the Azure portal.

SSO URL, Issuer and Certificates are filled in automatically.
If your certificates expired, you can add new ones on the Edit IdP form.
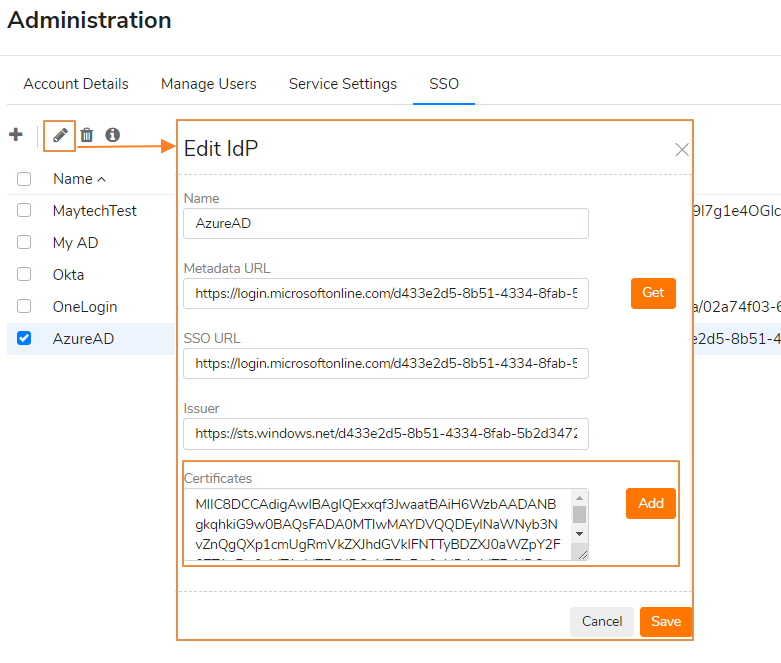
- Select Name ID Format as Email address.
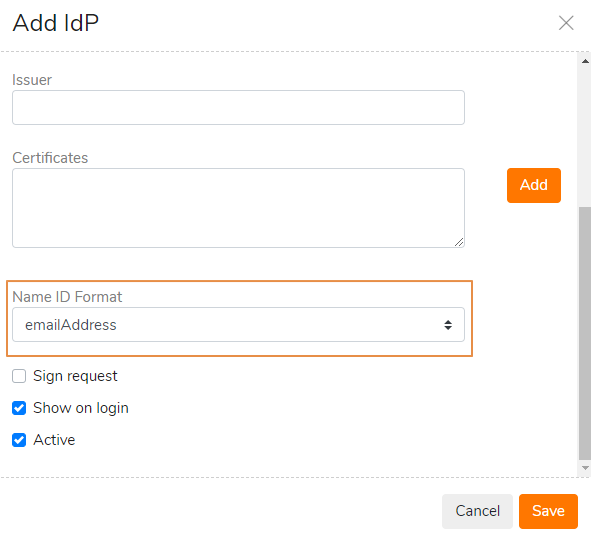
- Save your configured IdP.
- Select your recently added IdP from the list and click on the info icon from the top menu to get necessary info for configuration of SSO in Azure AD.
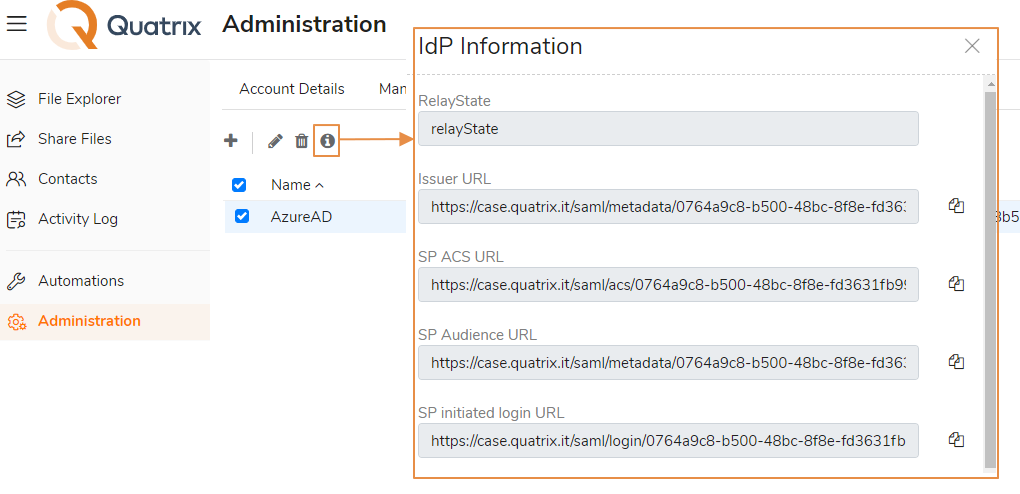
Keep this page open as this info is required for setting up your Quatrix application in Microsoft Azure AD.
Configure Quatrix app in Azure AD
Next you need to add SSO details of your Quatrix application to Microsoft Azure portal.
- Go to Home → Azure Active Directory → Enterprise applications → your application and select Single sign-on (or select Set up single sign-on in the Getting started section).
- This opens the page for setting up single sign-on.
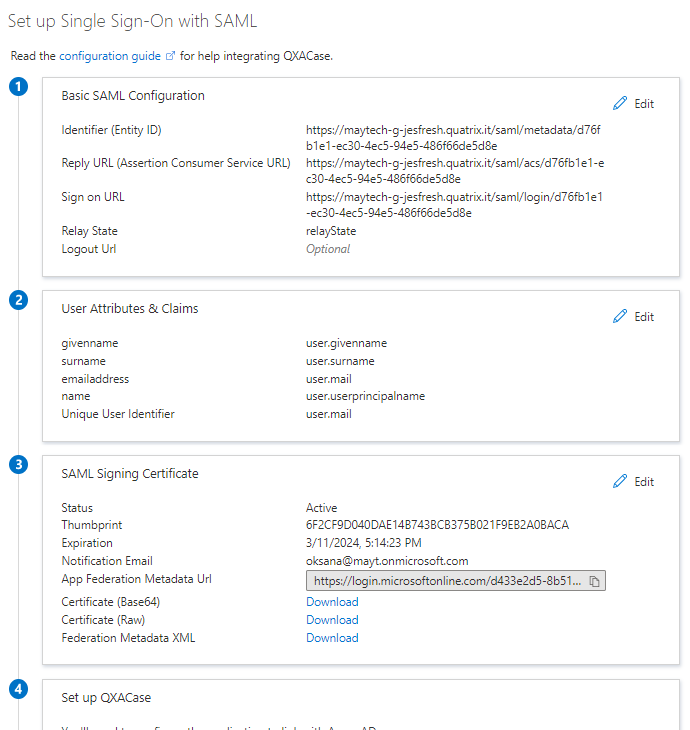
Click on the pencil (Edit icon) at the top right corner of the Basic SAML configuration section and edit the following fields:
- For the Identifier (Entity ID), paste the link copied from the Issuer URL field in Quatrix.

- For Reply URL (Assertion Consumer Service URL), paste the link copied from the SP ACS URL field in Quatrix.

For Sign on URL, paste the link copied from the SP initiated login URL field in Quatrix.

- For the Identifier (Entity ID), paste the link copied from the Issuer URL field in Quatrix.
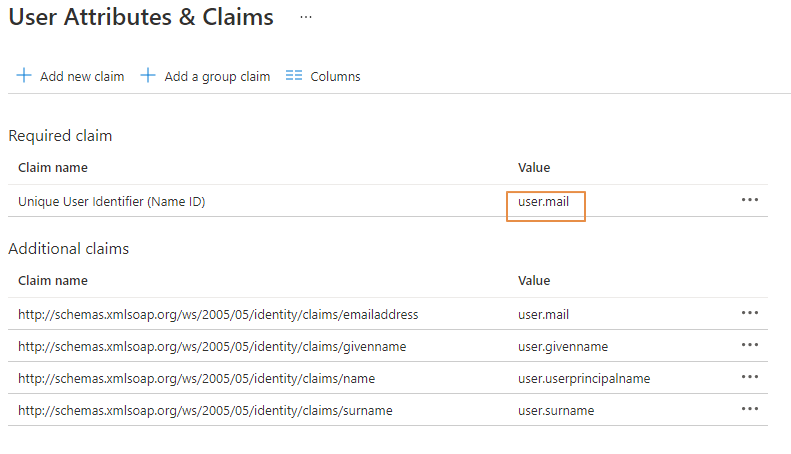
In the User Attributes and Claims section, click the Edit icon and select user.mail as a Unique User Identifier.
- Save the settings.
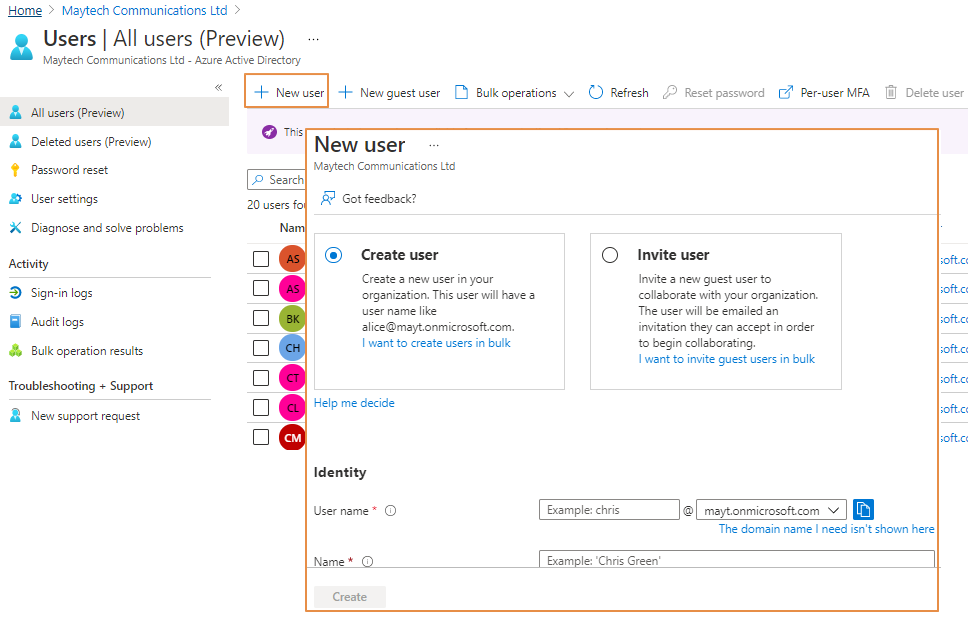
Add users to Azure AD
When all necessary configurations are set up, you can add your Quatrix users to MS Azure AD portal.
If you haven't added any users to your Quatrix account yet, check out instructions here.
- Go to Home → Azure Active Directory → Users → + New user and add a user.
- Return to Home → Azure Active Directory → Enterprise applications and select your application.
Click on Assign users and groups in the Getting started section.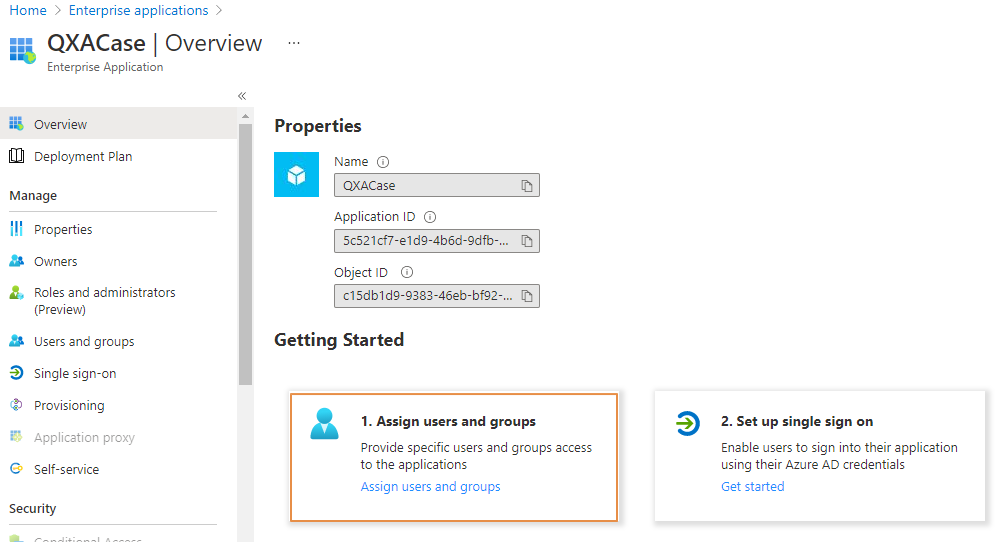
- Click + Add user/group in the Users and groups dialog

- Click on None selected link, find the users that you would like to add to your application and click Select.
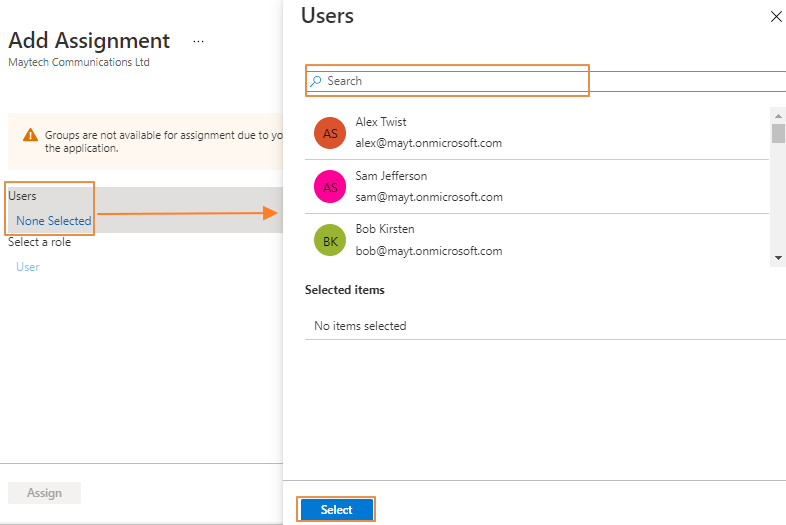
- In the Add Assignment dialog, click the Assign button.
Test SSO
Before testing if your configured SSO is working, make sure that you have added Quatrix test users to your Azure AD application.
You can test your SSO configuration with the following options:
- Click on Test this application in the Azure portal. This will redirect you to the Quatrix login page.
- Go to Quatrix login page directly and initiate the login flow from there.
If you are able to log in to your account using Azure ADs credentials, your test is successful.
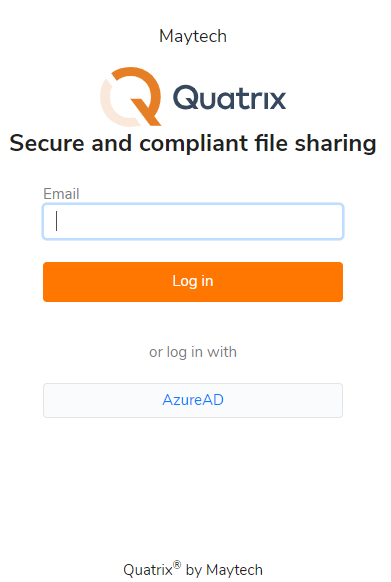
When you have completed the configuration, you will notice the button with your newly added IdP (AzureAD) on the login page.
Your users can now log in to Quatrix using their Azure AD credentials.