Quatrix Remote Agent for Windows
Windows Installation and Usage
Quatrix agent is designed to run as a Windows service.
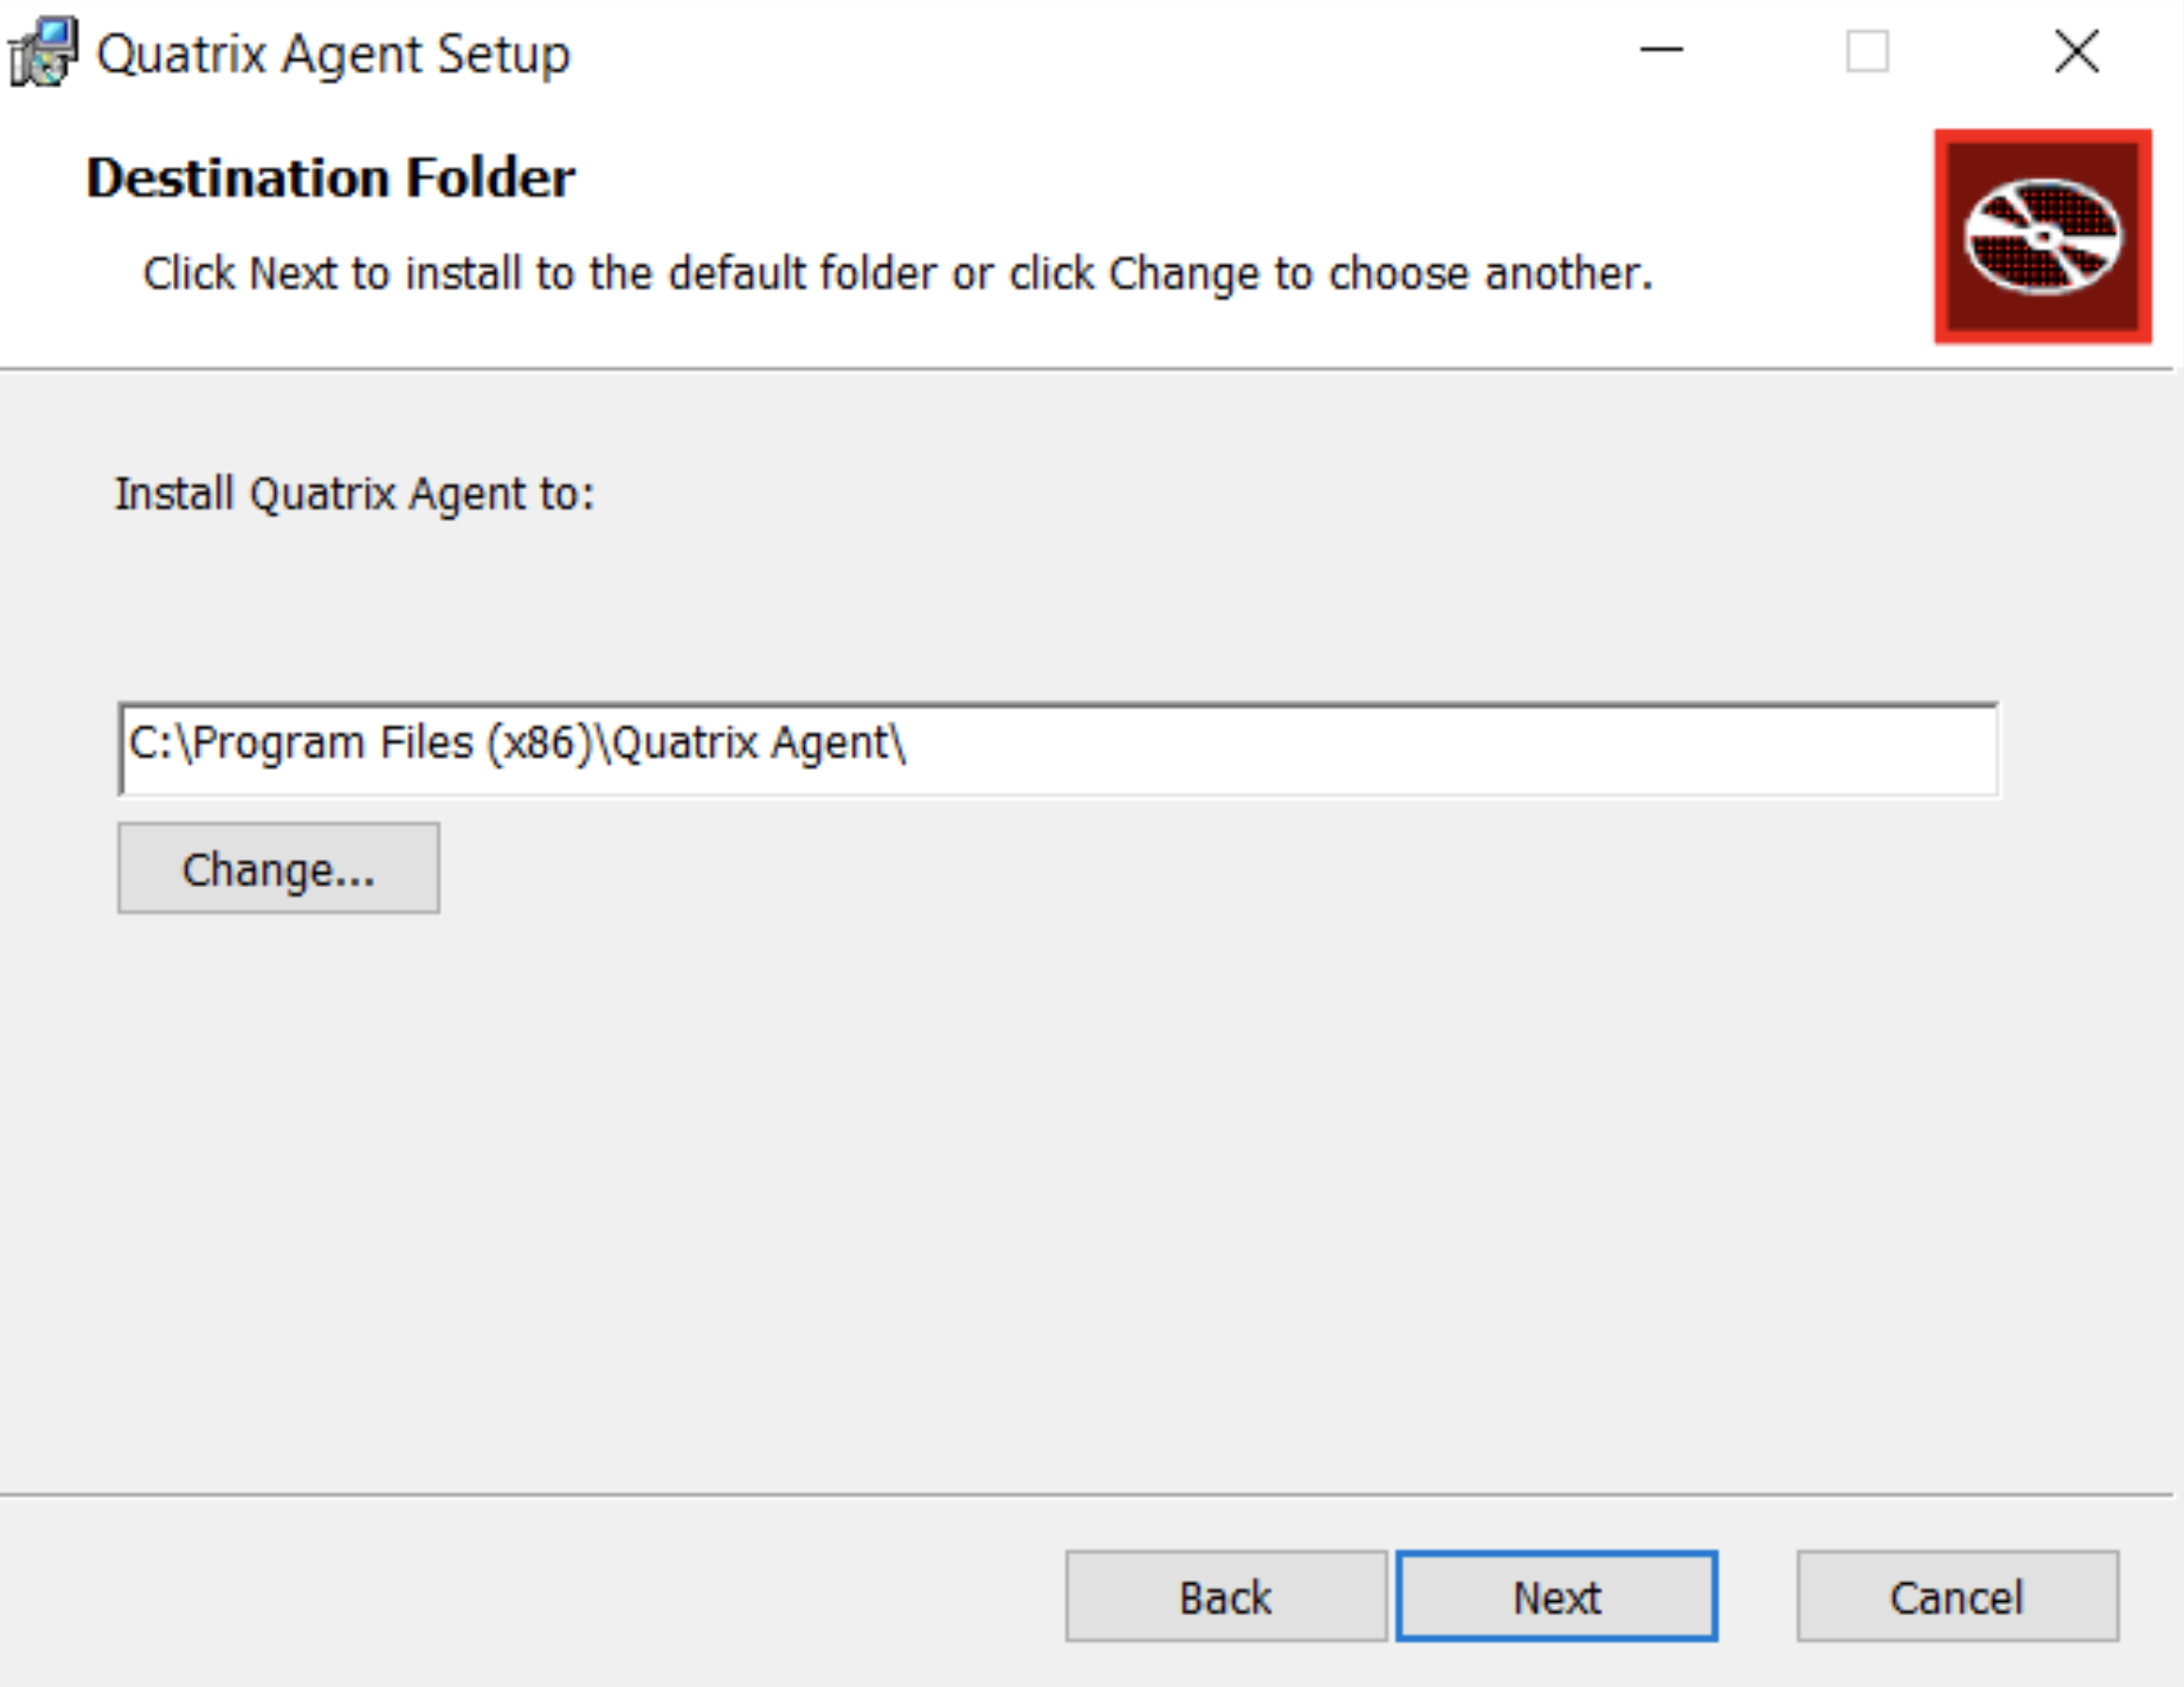
The installer will allow you to select the path where you want the agent executable files to reside. By default the Quatrix Agent installs at – “Program Files (x86)\Quatrix Agent\” but you can change this during install.
After running the Quatrix Agent MSI installer and seeing a successful install.
Check services to see that agent is running.

Using Quatrix Agent Management Interface to complete agent configuration.
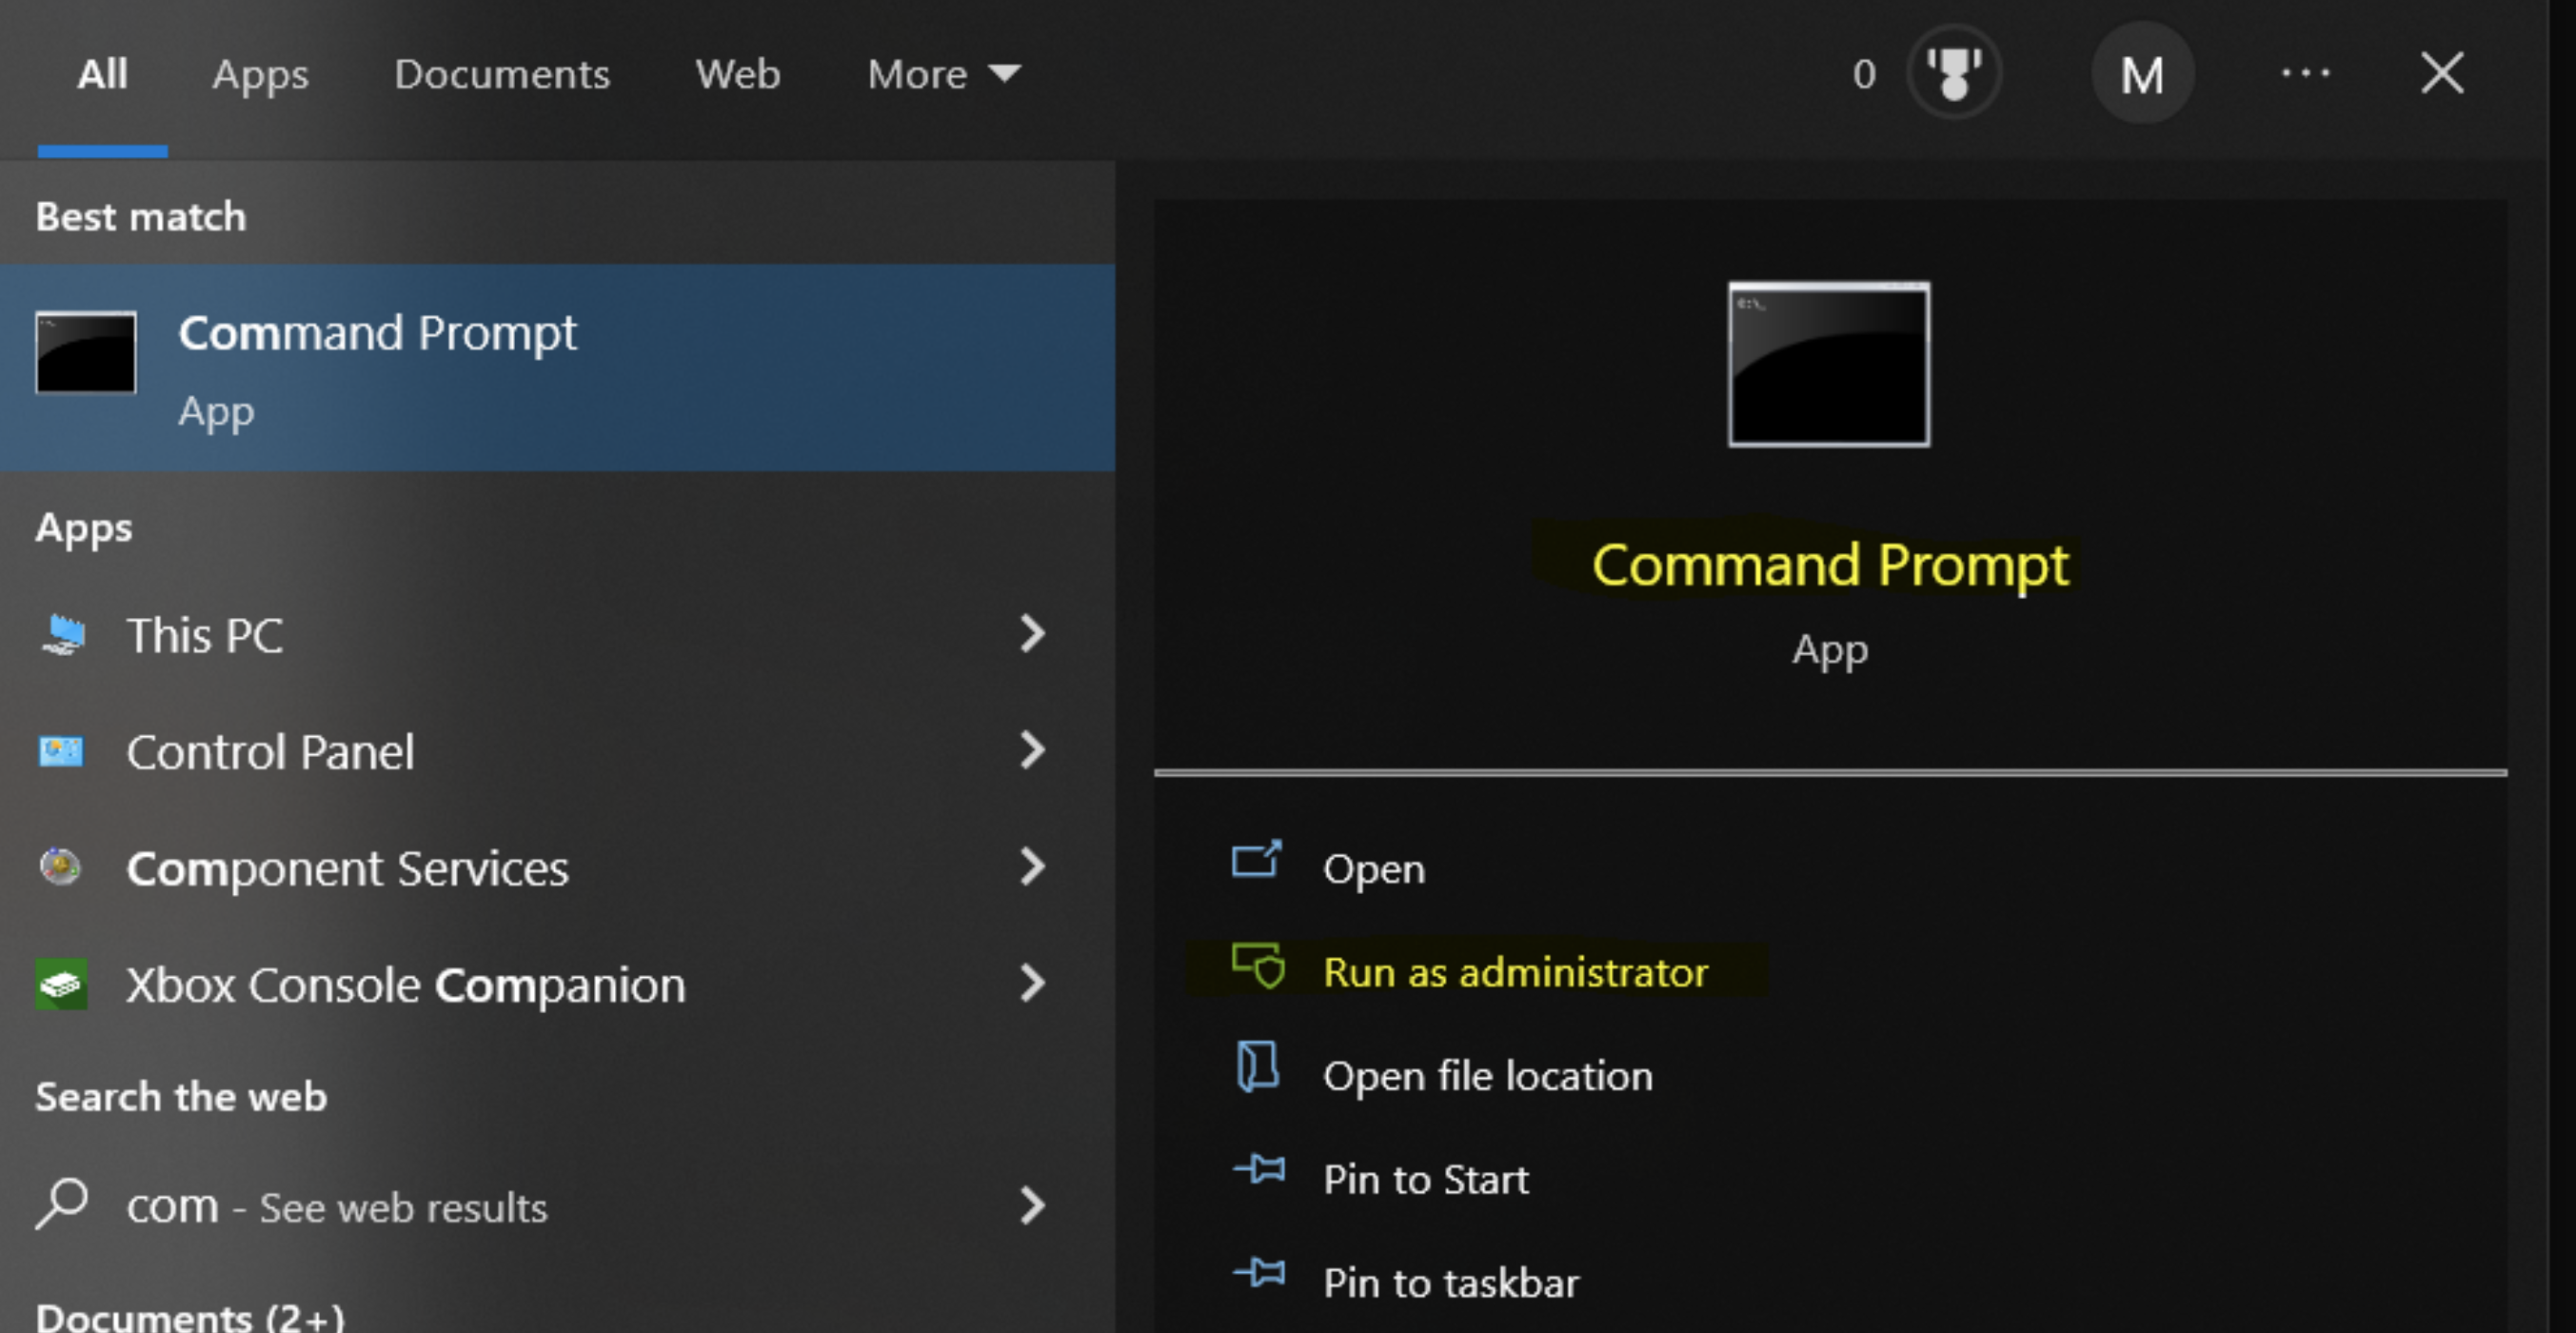
Open a command prompt preferably as administrator
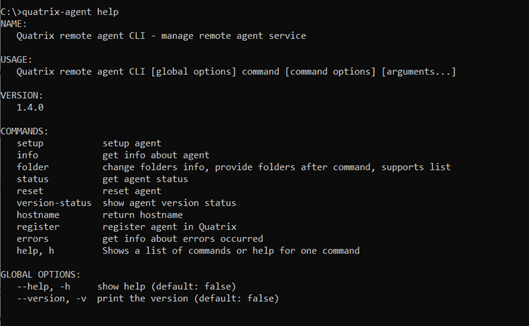
To get an idea of the commands and arguments available for the agent you can type “quatrix-agent help” once in the command prompt.
Continue with Agent setup and configuration.
To see what command options and arguments are available for the setup command, you can use the help menu if desired. To view setup help type “quatrix-agent setup -h”
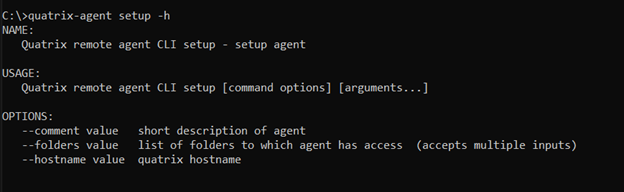
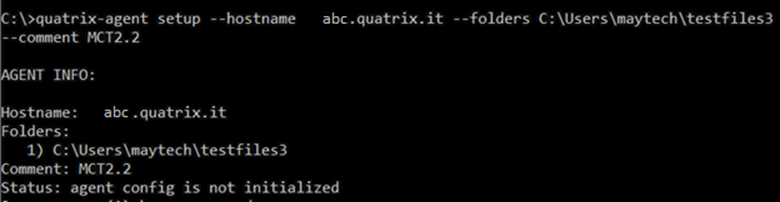
Help gives you information about the expected arguments needed to initially configure the agent. You must provide the Quatrix account hostname that you wish the agent to connect to. You must provide a path statement for the folder you wish the agent to access for file transfers. And if you wish an optional comment like a friendly name for the agent.
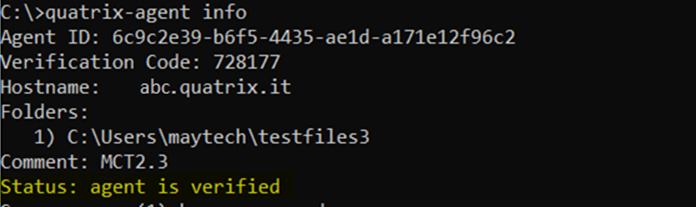
After typing the setup command and providing the arguments, you should see the basic configuration information listed AGENT INFO:
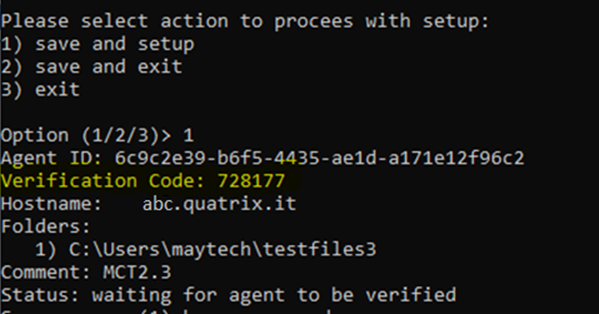
To initialize the agent, we’ll need to approve it on the Quatrix side. Saving the configuration should let you view the Verification code you will need to enter on the Quatrix admin interface.
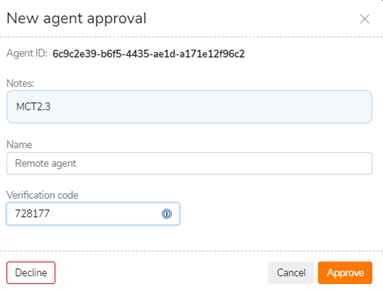
Once approved the agent status should display “Live” in your Quatrix admin interface. Give it a minute or refresh your view if you don’t see it go live immediately.
Once you see the agent live on the Quatrix side you can go back to the agent command prompt and run the “Info” command again. You should now see the agent display as “verified”
Best Practice – Be sure to name your agent with an easy to identify label. You do this in the Quatrix interface.
For example, the location where the agent is deployed or perhaps the project it’s associated with? Whatever you choose, know this can be helpful going forward. Both the name of the agent and the workflow are significant. In automation naming convention can play a key role for future troubleshooting, sorting, and general organizational purposes.
The agent is now ready to be used to transfer files between the local folder(s) the agent has access to and your Quatrix cloud account using “External Workflows”
For detailed information about using External Workflows visit our Help Centre.
FAQ’s
How can I see which local folders my agent is currently monitoring?
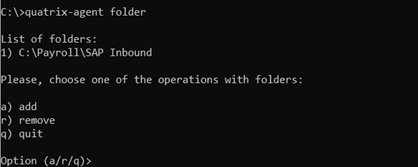
From the command line type – quatrix-agent folder. This will display the current folders the agent has access to as well as other options.
How do I add or remove agent access to a folder?
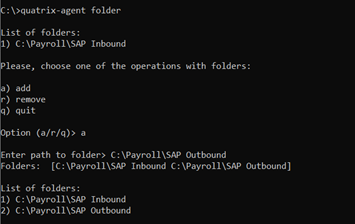
From the command line type – quatrix-agent folder. This will display the current folders the agent has access to as well as other options. Follow the self-explanatory prompt to add, remove, or quit (exit out) folder command. The example below shows a folder being added for agent access.
How can I see what agent commands and arguments are possible?
From the command prompt type – quatrix-agent help.
How do I uninstall the agent?
Use Windows – Add or remove programs.


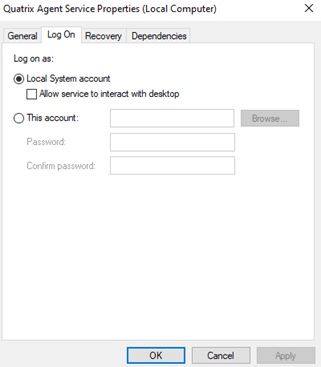
How do I know what windows account the agent is running under?
By default, the agent runs under the context of “Local System”. Go to Windows services panel and check.
Example Use Cases
Hybrid – Quatrix Cloud to On Premises
In this example, Company ABC’s customers are uploading files into a folder on ABC’s Quatrix cloud account. But the destination for some of these files is to a folder which resides on ABC’s internal private network. A simple solution is to place a Quatrix agent on the local network and provide the agent access to the destination folder.
Keep in mind the term “On Premises” can cover various scenarios these days. For example, someone’s premises might be a virtual private network hosted by Amazon or Azure. On the other hand, may be an organisations own data center in their own building. In many instances out of the box cloud connectors can be leveraged to transfer files between storage systems. But there are also many instances where the Quatrix agent is better fit.
Once the agent is installed, configured to monitor the local folder, and verified with the Quatrix control center, an “External Workflow” can be put in place to automate the secure file transfer from Quatrix Cloud to Quatrix Agent.
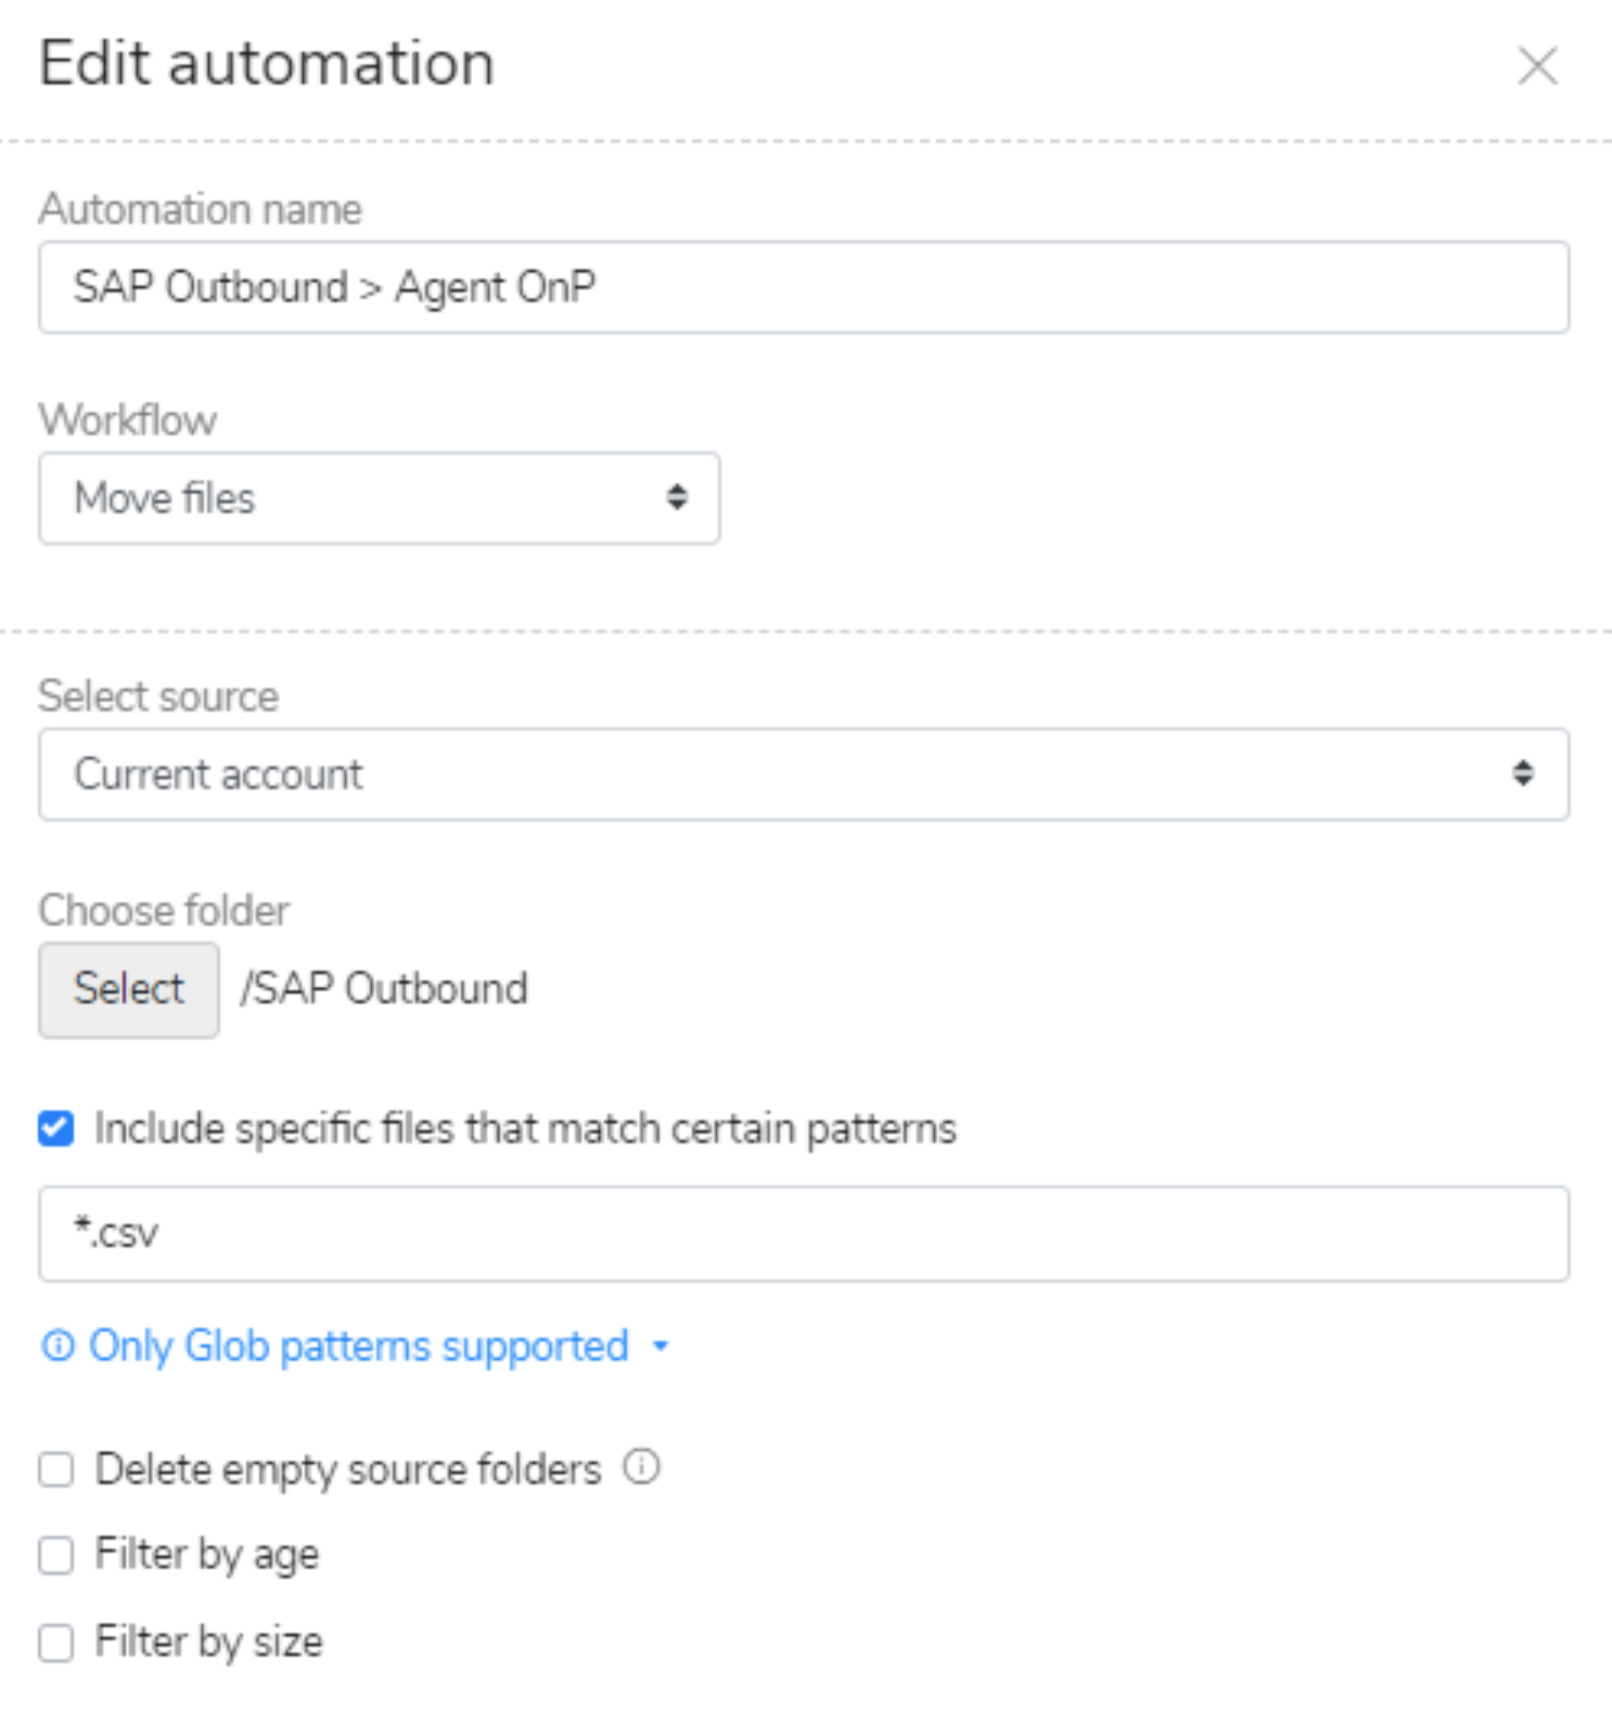
- From the Quatrix admin interface, navigate to the “External Workflows” menu and choose to add a new automation.
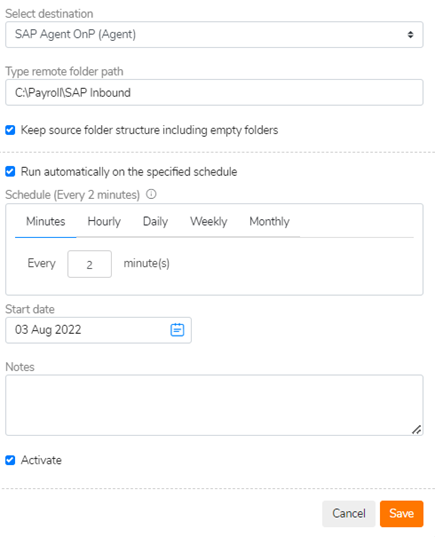
- Complete the dialog. In this example the Quatrix “Current Account” is the source, and the destination is the “Remote Agent”.
- Let’s imagine this workflow also requires filtering only CVS files to be transferred by the agent. And we also want the source folder on Quatrix cloud to be left clean of any CVS files after a successful transfer. So we use “Move files” as the workflow action to ensure there are no CSV files left in the source folder, and also include a file name pattern match for CSV files.
And as noted, the destination in this example is a target folder where the agent is installed on the private network.
In such an example an “Internal Workflow” might be used to move files other than CSV from the source folder for housecleaning or organizational reasons. There are many scenarios for using both External and Internal Automations.
For more information about automation in general visit our Help Centre.