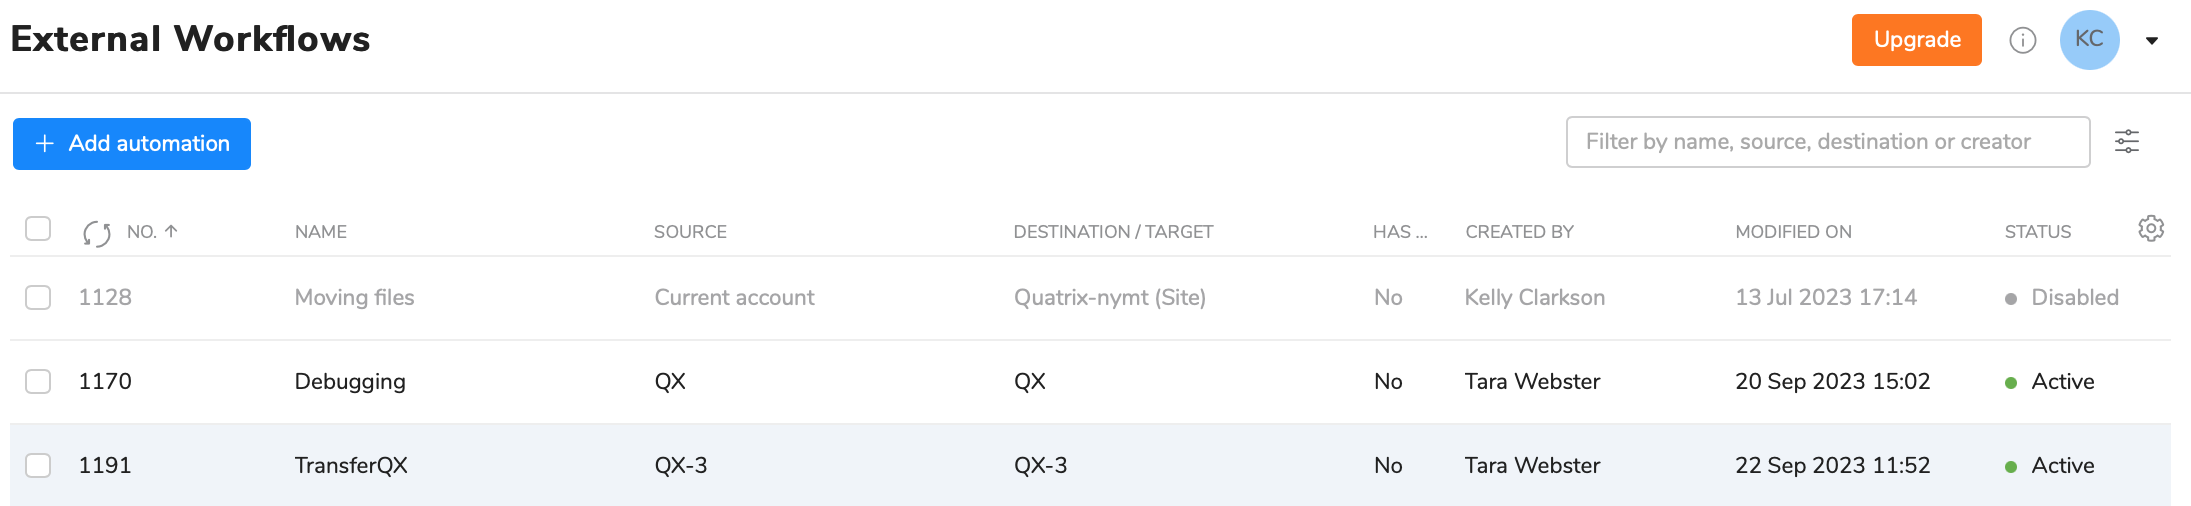
External Workflows
The Automation Module allows you to enable no code automated workflows between Quatrix and major cloud services / internal applications.
You can easily automate external file workflows such as transferring, copying or syncing files from your Quatrix account to any remote site or vice versa by creating external automation rules that will run with your specified file filters and on the desired schedule.
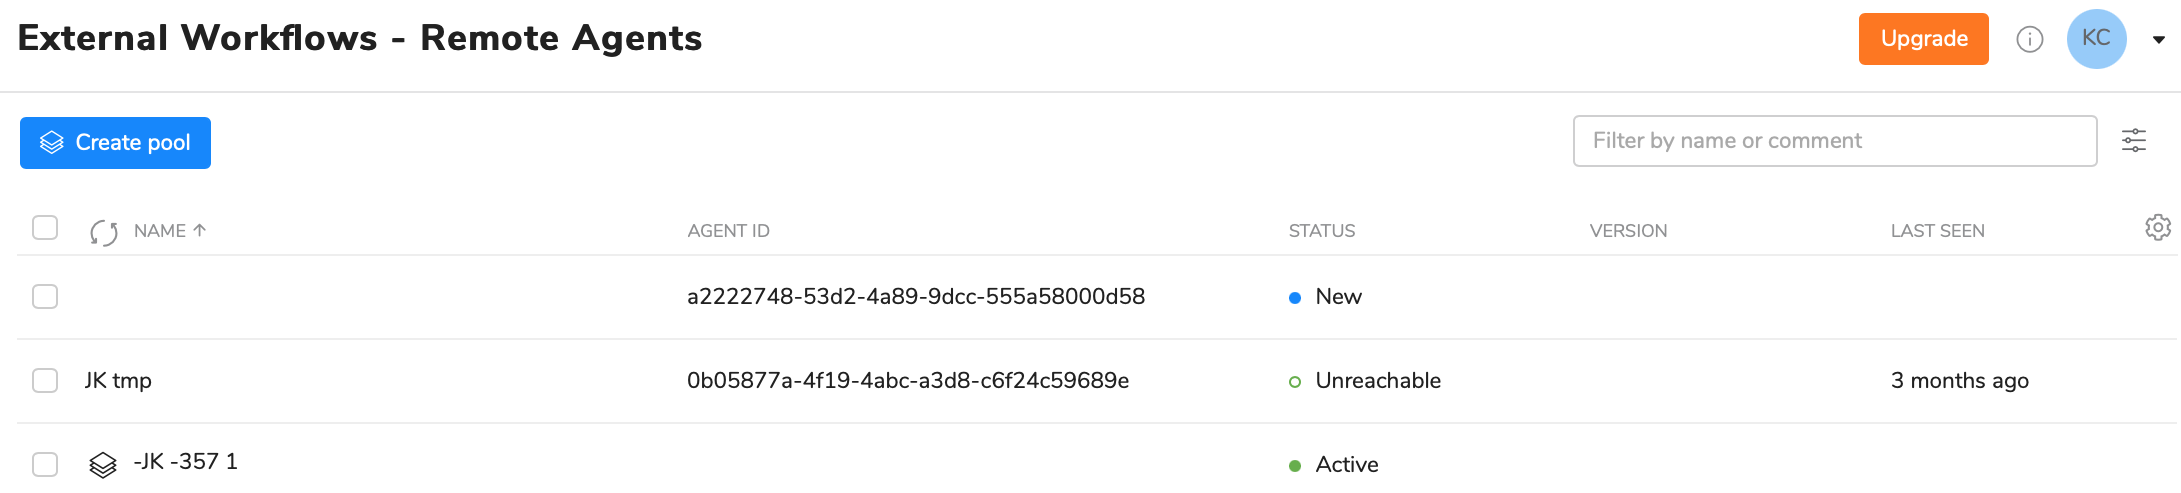
Quatrix Remote Agent is now available.
It's a centrally managed client software for creating secure connections between Quatrix and on-premise systems.
You can easily automate file exchange between on-premise networks and Quatrix in a secure and regulatory compliant manner.
Let us know if you wish to try. Learn more.
Our step-by-step guide below will help you set up automations depending on the workflow.
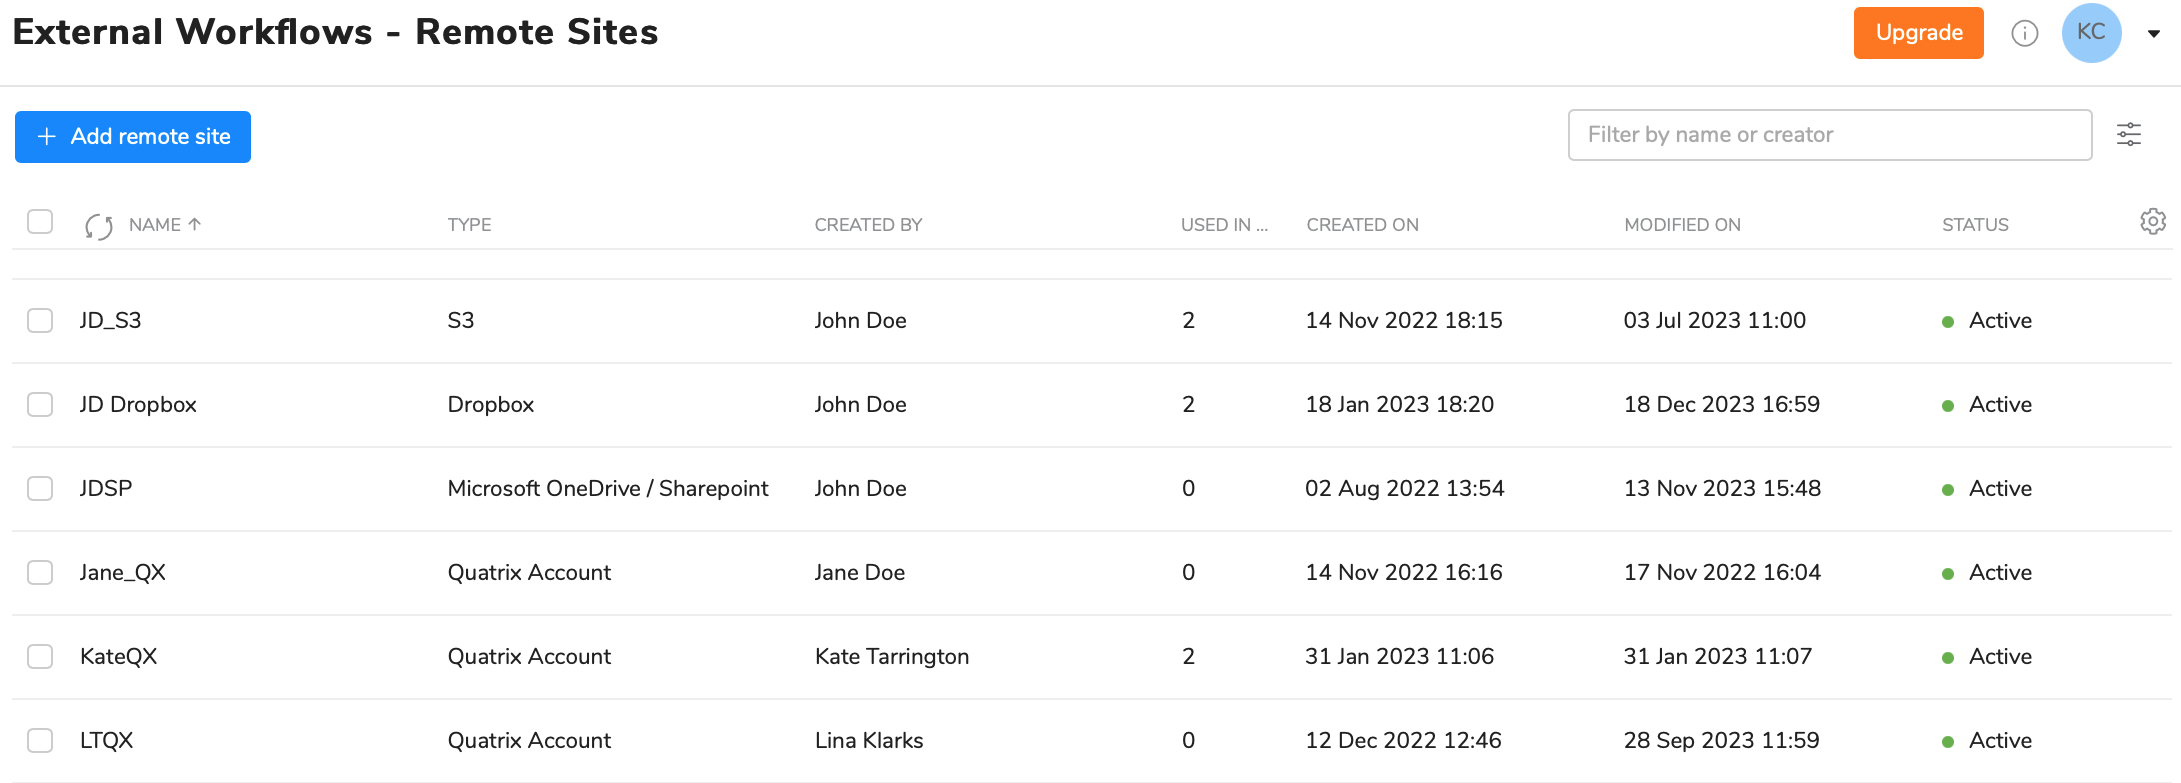
Add remote sites
Quatrix requires information about your remote sites that should be specified prior to the creation of automation on Remote Sites sub-tab.
To add a remote site, follow steps below:
- Go to Automations and open the Remote Sites sub-tab under External Workflows.
- Click on the Add remote site button and fill in required fields:
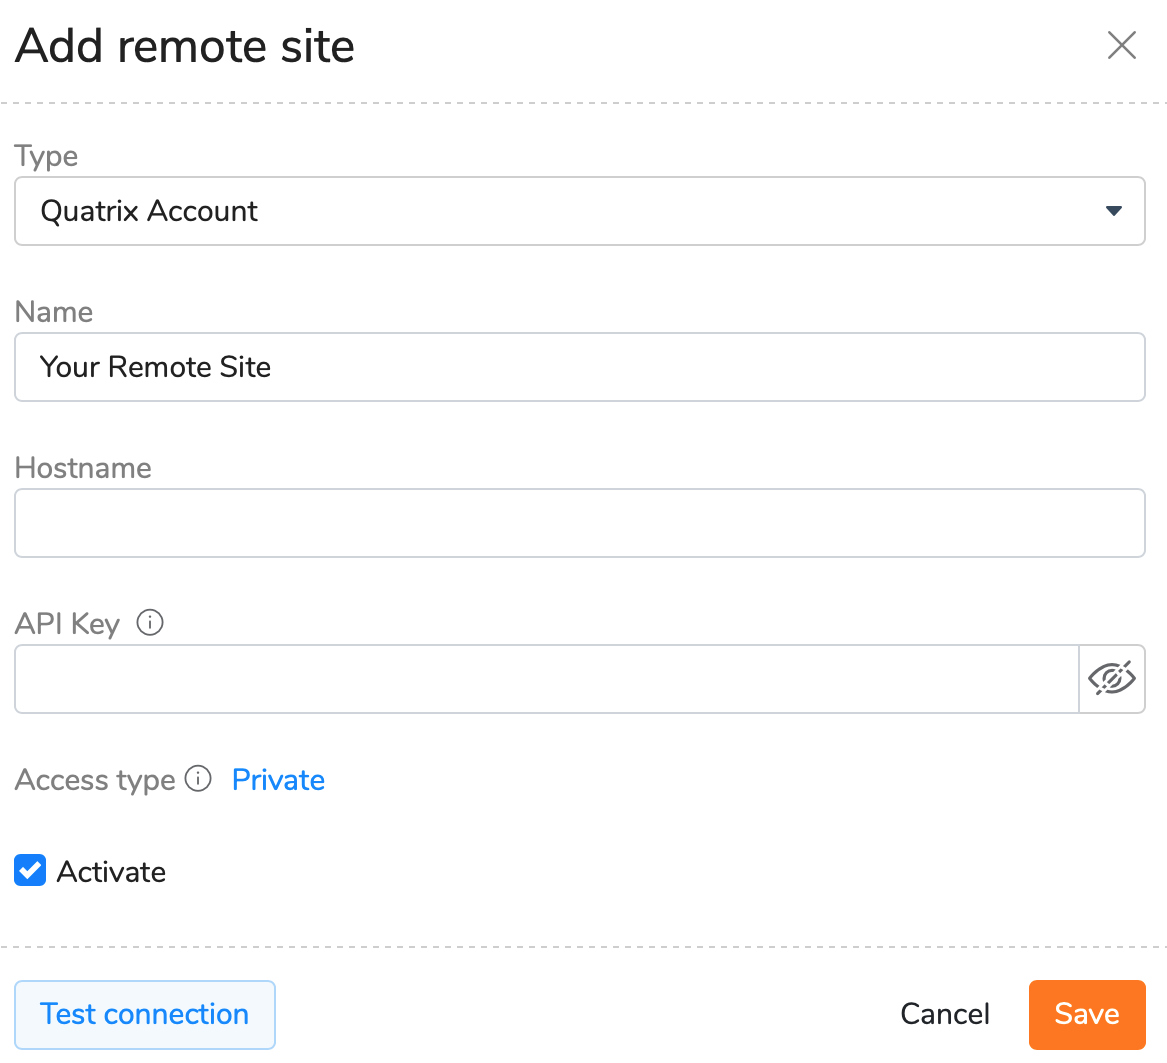
- Type - select the type of the remote site:
Quatrix account;
SFTP server;
S3 (cloud storage provider);
Microsoft Azure Blob Storage;
- Microsoft Azure Files Storage;
- Backblaze;
- Google Cloud Storage;
- Microsoft OneDrive/ Sharepoint;
- Box;
- Dropbox.
- Name - enter the name of your remote account.
- Fill in the required fields depending on the selected type of the remote site.
- Type - select the type of the remote site:
Activate by ticking the check box and save the settings.
You can test your connection to the remote site by selecting the desired one from the list and clicking on the Test connection button from the top or right-click menu.
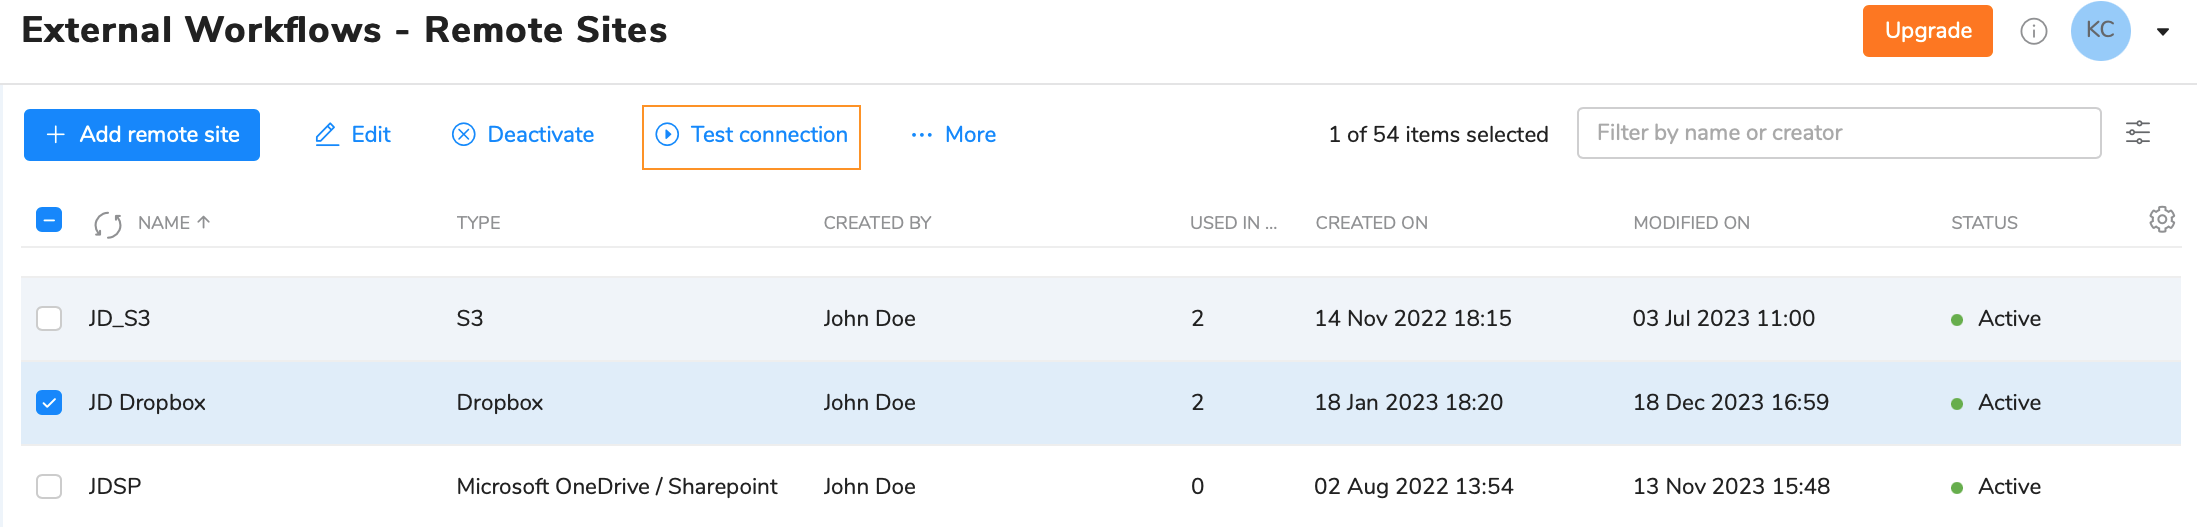
Moreover, you can test the connection while adding or editing the remote site.
The list of your saved remote sites will be displayed on the Remote Sites tab where you can easily manage them.
Remote Site Info
You can get info about the remote site by selecting a remote site from the list and clicking on the Remote site information button from the top or right-click menu.
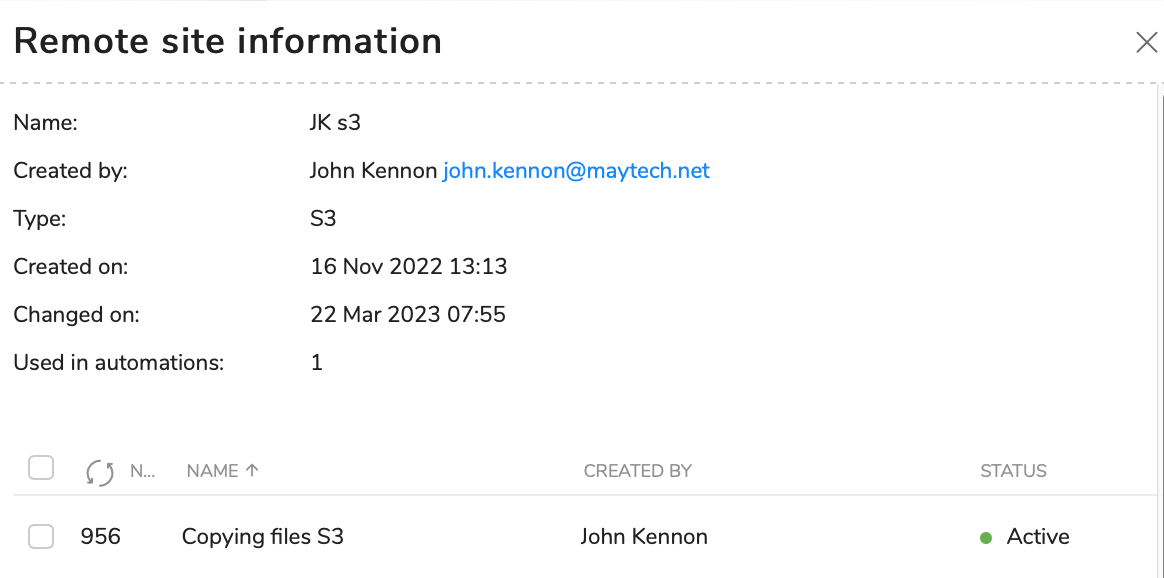
This form contains details about the selected remote site:
- name and type
- who added the remote site
- dates when it was added and edited
- number of automations it is used in
- list of automations that use the selected remote site. The list is displayed below the remote site details in the table view. Users can update or delete any listed automation.
Set up your workflow
Follow the steps below to add a rule for automating your desired workflow.
- Go to Automations and open External workflows.
- Navigate to the Remote Sites sub-tab, click on the Add remote site button to add your remote sites (as described above). Skip this step if you have already created a required remote site connection.
Go to External Workflows sub-tab and click on the Add automation button. This opens the form for adding your desired automatic rule.
You can use already existing automations for creating the new ones. Select the desired automation and click on the Duplicate button from the top or right-click menu.
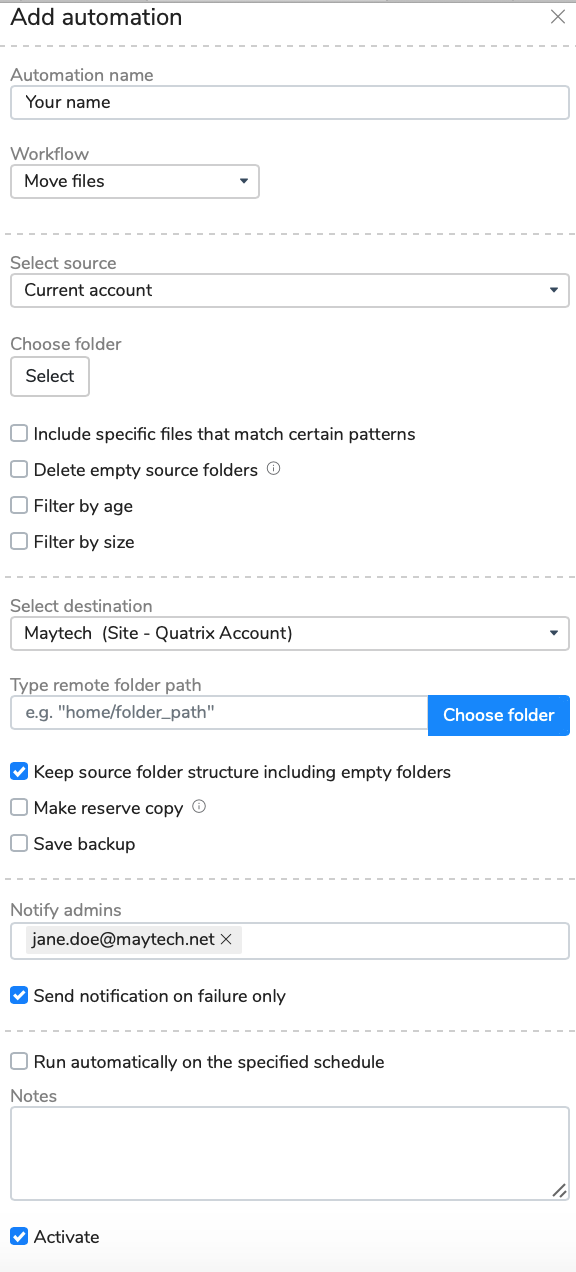
- Enter the name for your automation.
- Select a preferred workflow.
- Move files - allows you to move files to/from Quatrix and any remote site keeping the same file structure.
- Sync files - you can keep folders on source and destination synced.
- Copy files - enables copying desired files form the source location to the destination skipping already coped files.
- Delete files - allows you to delete files on remote sites. This workflow requires taking other steps than listed below.Click here to learn steps for file deletion
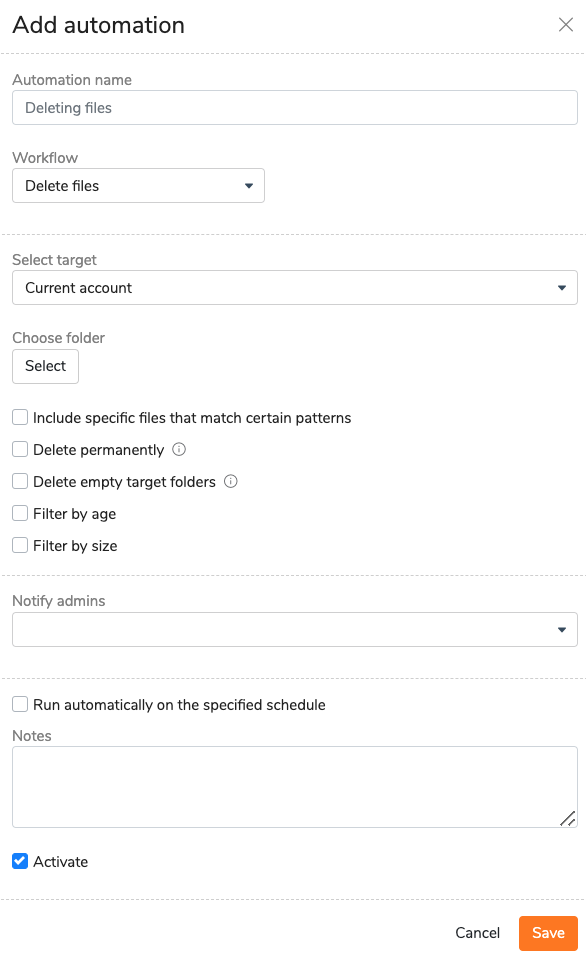
- Specify the name for automatic deletion and select an appropriate workflow from the drop-down list.
- Select the target - the place where you would like to perform file deletion.
- Choose the folder.
- Include specific files that match certain patterns - allows you set the pattern that files should include to be transferred.
- Delete permanently - delete files without recovery.
- Delete empty target folders - empty folders with deleted files will be deleted.
- Set filters by file size or age - e.g specify the minimum size if you don't want to delete any file smaller than this size.
- Notify admins - specify emails of admins for notifications.
- Send notification on failure only - tick if you wish to send notifications only in case of failures.
- Run automatically on the specified schedule - set the time when your automation will run.
- Pick the start date.
- Write some notes regarding automation.
- Tick Activate and save the rule.
- Specify the source by selecting the remote site from the list.
- Choose the folder from where you are going to transfer files.
- Filter your files for the transfer:
- Include specific files that match certain patterns - allows you set the pattern that files should include to be transferred.
- Delete empty source folders - tick if you want to delete empty folders from the source after file movement.
- Set filters by file size or age - e.g specify the minimum size if you don't want to transfer any file smaller than this size.
- Specify the destination by selecting an appropriate remote site.
- Remote folder path - enter the path which shows where you want to paste your transferred files, or click on Choose folder button and select the desired folder.
- Keep source folder structure including empty folders - this option allows you to preserve the same folder structure.
- Make reserve copy - folders with copies will be created in the selected directory every time the automation runs.
- Save backup - create a folder with the backup copy. (Backups are not supported for SFTP and Box)
- Use temporary files for partial uploads - add a temporary suffix to incomplete files while uploading. If the upload finishes successfully, temporary files are changed to the target ones. If it fails, incomplete files are deleted.
- Temporary file suffix - specify your preferred temporary file suffix for incomplete files. '.partial' is used by default.
- Notify admins - specify emails of admins for notifications.
- Send notification on failure only - tick if you wish to send notifications only in case of failures.
- Run automatically on the specified schedule - set the time when your automation will run.
- Pick the start date.
- Write some notes regarding automation.
- Tick Activate and save the rule.
As soon as the rule is created, it will be added to the list on the External Workflows tab.
You can activate your automation rule manually - for a non-scheduled one action performance - by selecting an appropriate rule from the list and clicking on the Run now button from the top or right-click menu.

Running automations can be stopped by clicking on Stop icon next to the Running status. This is suitable for transferring large volumes of files.
Supported storage providers
- S3 Connectors
- SFTP
- Microsoft Azure Blob Storage
- Microsoft Azure Files Storage
- Quatrix
- GCP (Google Cloud Platform)
- Backblaze
- Microsoft OneDrive/ Sharepoint
- Box
- Dropbox
Storage providers are being added all the time. Let us know if what you need is not supported.