Internal Workflows
You can automate your actions in the account by setting up automation rules for internal workflows such as moving files to a desired location, tidying up inactive users or contacts, cleaning up unnecessary files, generating activity reports.

Automatic file movements or copying
This feature is the foundation of automatic file organizing flow. As you use your account to share and upload files, it’s easy to become buried in a sea of files with different names. That is the reason why it is important to keep your account tidy and organise your files by creating folders and putting files inside of them. You can automate the process by using automatic file movement feature. It will take a few minutes of your time to set up a rule that will do it for you.
To move or copy files automatically:
- Navigate to Automations and go to File Operations under Internal Workflows tab.
Click on the Add automation button and specify the following:
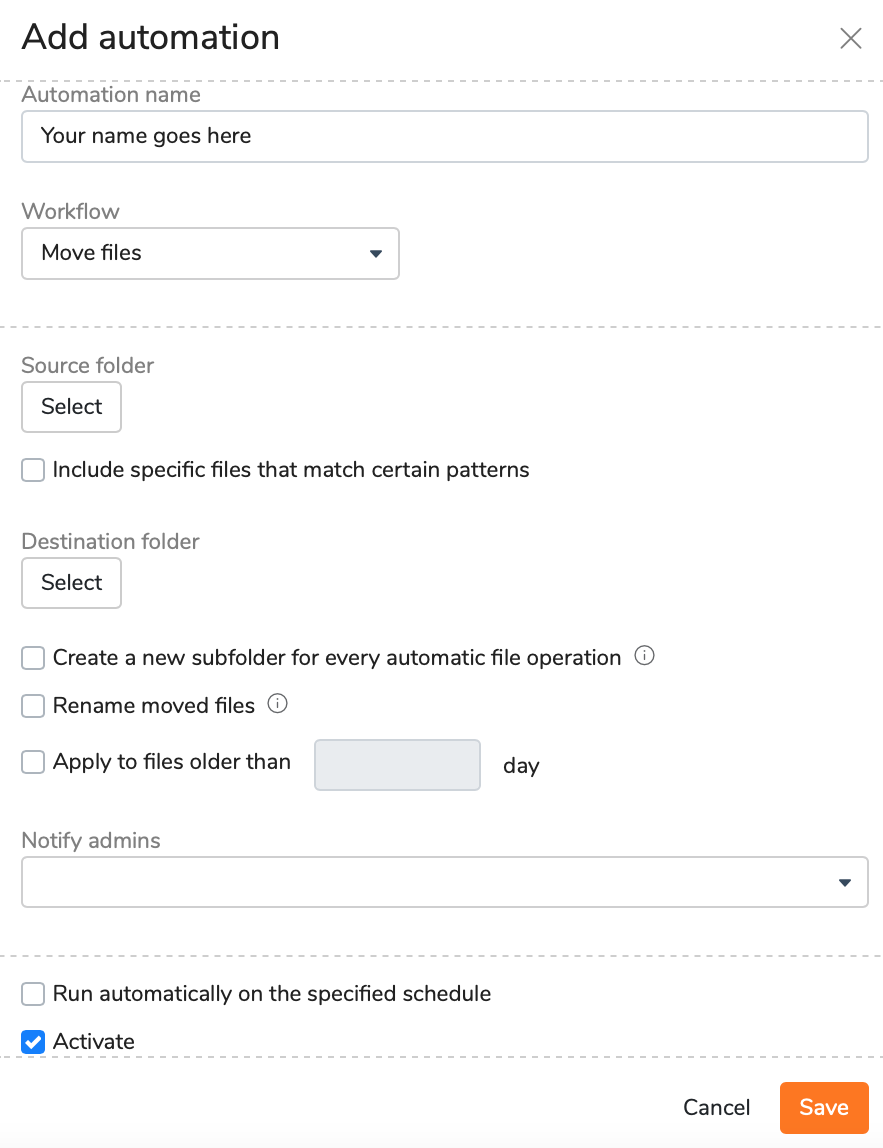
Automation name - specify the name for your workflow.
Name your automations wisely
Automation name should be very clear and provide a self-descriptive idea about what file operation should be done e.g. Archived files of Company 1.
- Workflow - select move or copy files.
Source folder - select the folder from where you are going to move or copy your files.
The Moving of subfolders is supported.
Include specific files that match certain patterns - you can specify what files should be moved or copied by typing a desired pattern e.g. *.pdf, *company_name*.
Only Glob patterns are supportedpattern:
{ term }
term:
'*' - matches any sequence of non-Separator characters
'?' - matches any single non-Separator character
'[' [ '^' ] { character-range } ']' - character class (must be non-empty)
c - matches character c (c != '*', '?', '\\', '[')
'\\' c - matches character c
character-range:
c - matches character c (c != '\\', '-', ']')
'\\' c - matches character c
lo '-' hi - matches character c for lo <= c <= hi- Destination folder - select the folder where you would like to move or copy your files.
- Create a new subfolder for every automatic file operation - your files will be added in a separate subfolder with the date in the name.
Rename moved or copied files - tick to add the date to every containing file.
- Filename conflict action (for copying files) - select your preferred action if the filename conflict occurs: overwrite existing file (always), overwrite existing file (if older), rename existing file, rename new file, skip file.
- Apply to files older than - specify the age that the file should reach to be moved or copied.
- Notify admins - type emails for notifications.
- Send notification on failure only - ticked by default.
- Run automatically on specified schedule - add the frequency that the automation should run.
- Start date - pick the date when to start the rule.
- Activate - tick to make it active.
- Click Save.
Quatrix will monitor selected folders and when a file matches your conditions, it will move or copy it automatically according to the created rule.
Automatic deletion of files or folders
Delete Files sub-tab allows you to adjust the workflow for automatic deletion of files that are older than a specified period of time.
To add a rule for auto-deletion, follow these steps:
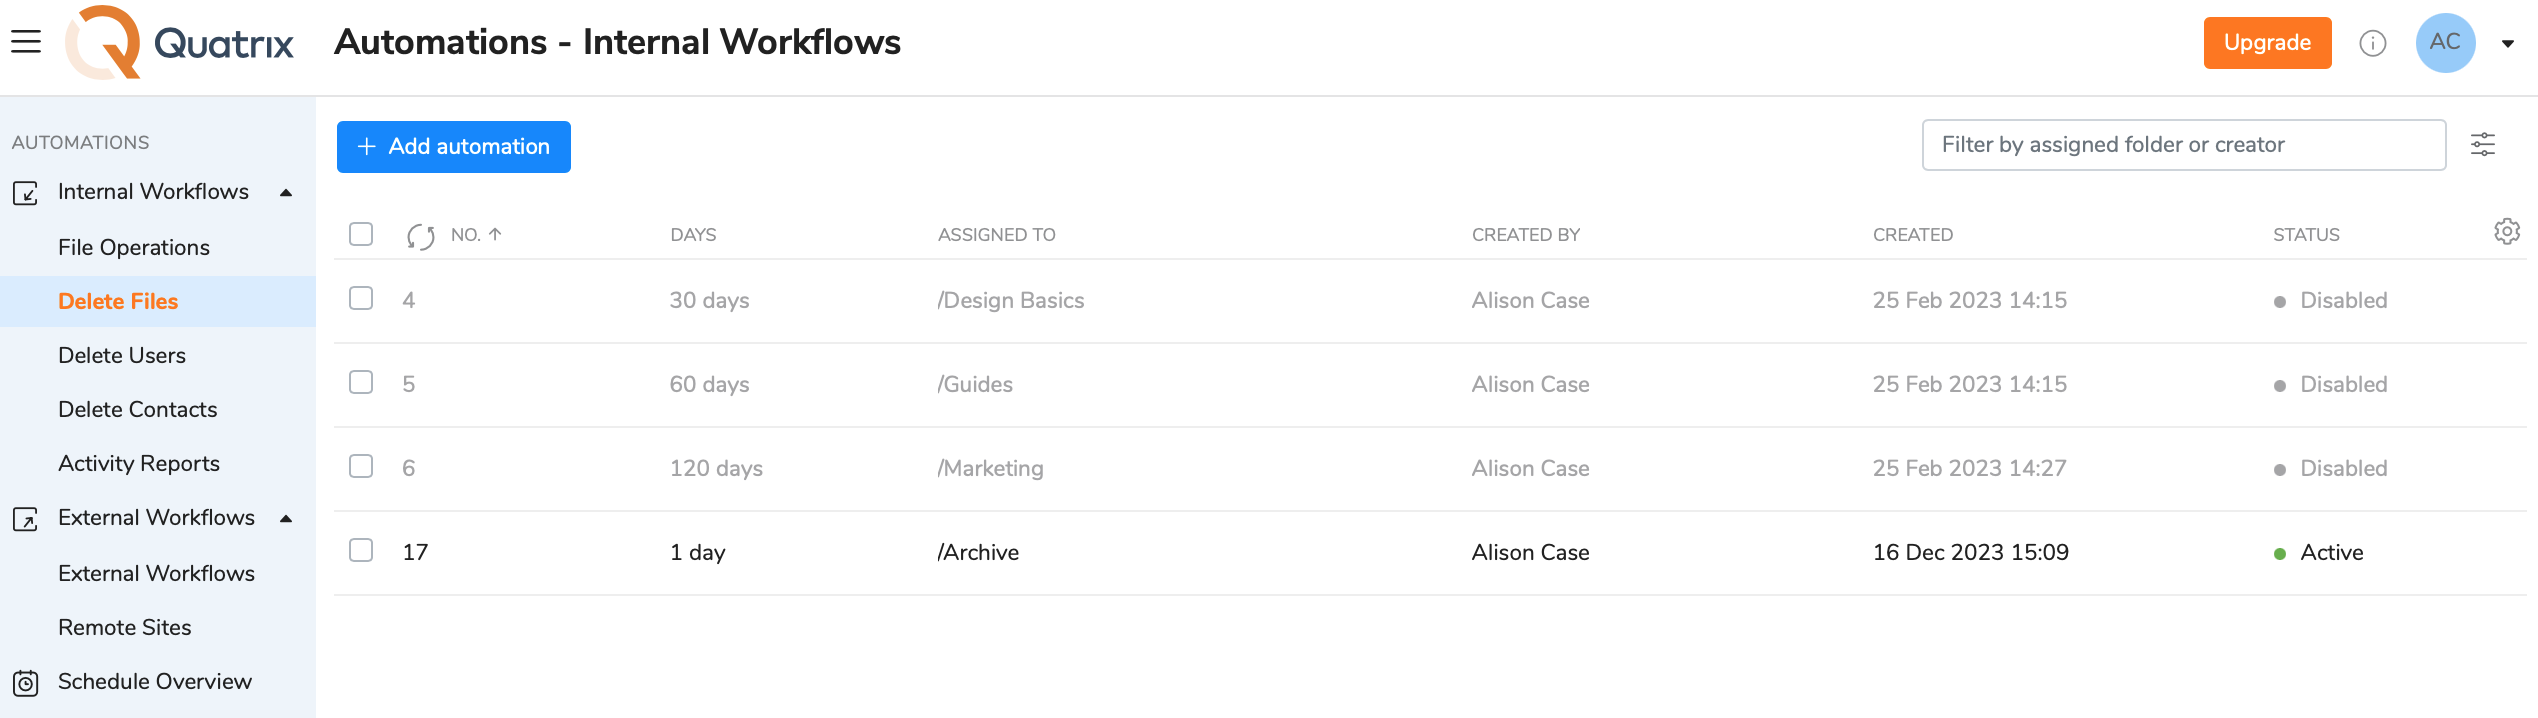
- Go to Automations and navigate to Delete Files under Internal Workflows.
- Click on the Add automation button and specify settings for the automatic file deletion:
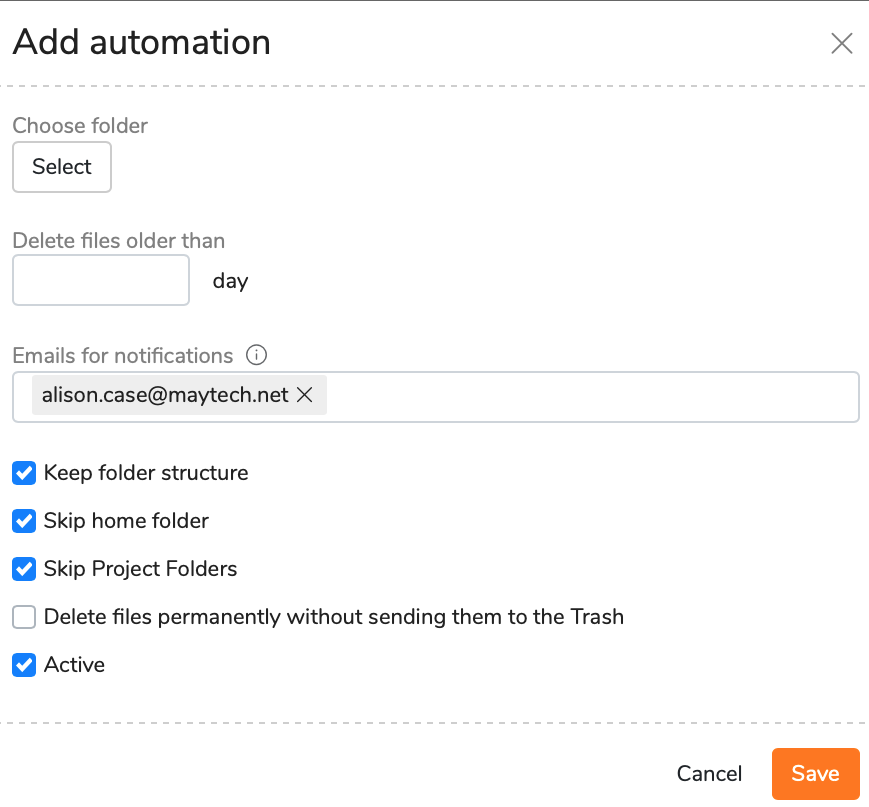
- Choose folder - click on the Select button to choose the folder where you would like to activate the deletion. 1 folder for 1 rule!
- Delete files older than - specify the time interval the deletion should be performed.
- Emails for notifications - type in emails for file deletion notifications (your email is listed by default).
- Keep folder structure - tick this check box if you want to save the structure with folders and delete the contents of these folders.
- Skip home folder - tick if you intend to skip files of inactive users.
- Skip Project Folders - tick to leave Project Folders.
- Remove files permanently without sending them to the Trash.
- Active - tick if you would like to activate the rule.
- Save the rule.
If there is an overlapping of auto-deletion rules, the rule created first will apply.
Your added rules will be displayed in the list and will contain brief information about the adjusted deletion. All your listed rules can be easily managed by ticking the check box next to the rule and selecting an appropriate option from the top menu. You can edit, delete, activate or deactivate auto-deletion rules. The edition of the rule presupposes the change of previously specified settings. If you delete the rule, it won't be either available or applicable. The deletion cannot be restored back.
To make the rule inactive, click on the Deactivate icon and this grays the rule out in the list. Whilst the Activate icon allows to turn the rule on again.
Activation / deactivation of multiple automations
Users can activate or deactivate several automation rules at the same time by using corresponding icons from the top or right-click menu.
Automatic deletion of inactive users
In case where many users share a common account it is always advisable to delete inactive users on a regular basis in order to control the appropriate usage of user licenses.

To automate the process of cleaning up inactive users from your Quatrix account, follow the steps below:
- Go to Automations→ Internal Workflows → Delete Users sub-tab.
- Add a rule by clicking on the Add automation button from the top or right-click menu.
- Specify the deletion options:
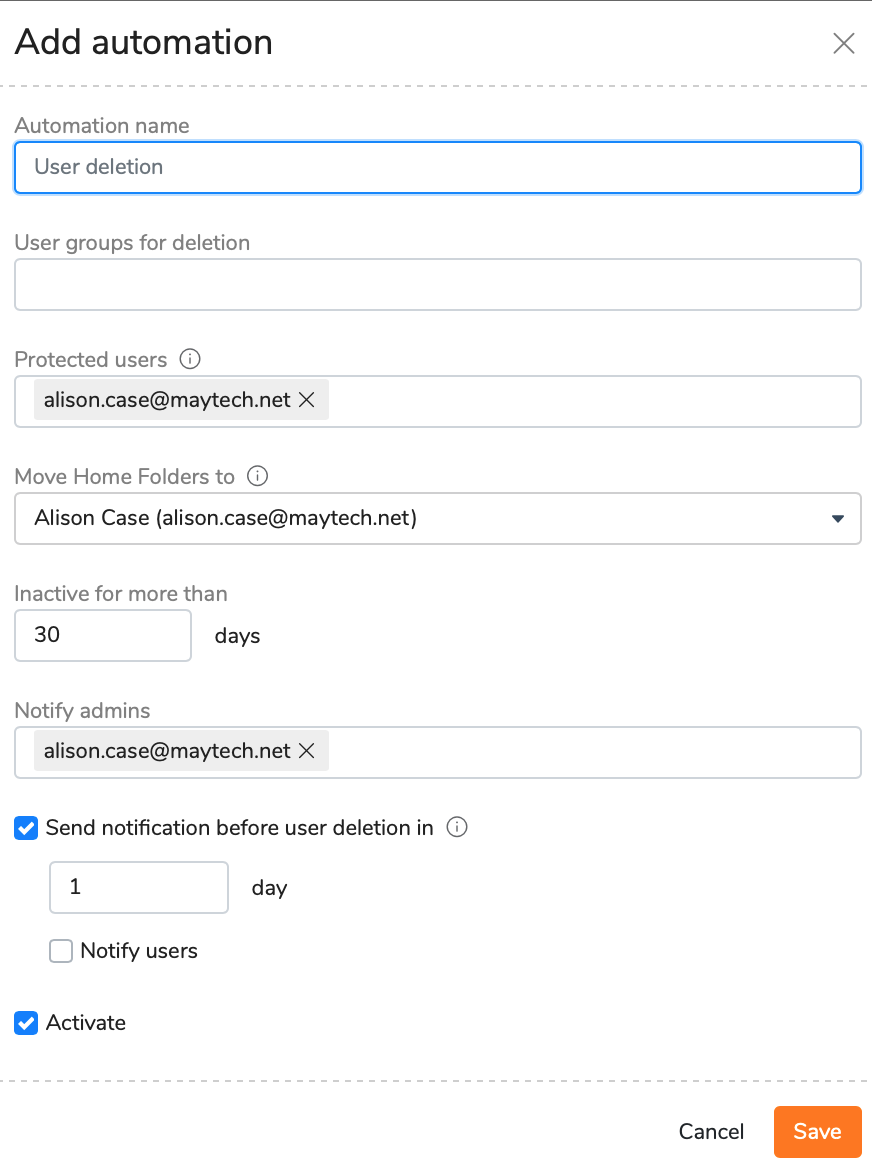
- Automation name - enter an appropriate name for the automation;
- User groups for deletion - select user groups for deletion;
- Protected users - specify users that will be skipped in the process of deletion;
Move Home Folder to - select the administrator for moving files and folders of deleted users to a special folder called “Removed User Homes”. Each administrator of the system may have such a folder if automated user deletion is targeted to them.
This folder is automatically created the first time this operation is run for the specified administrator. You can then further manage the data manually, or automatically using internal workflows features.
- Inactive for more than .. days - specify the number of days for which users have to be inactive;
- Notify admins - type emails of administrators for notifications of deletion;
- Send notification before user deletion ... days - define when to send notifications before user deletion;
- Notify users - tick if you would like to send notifications to users that will be deleted;
- Activate - tick to activate the rule.
- Click Save.
Automatic deletion of inactive contacts
The more you share with new recipients, the more contacts you have in My Contacts list. Our system automatically creates contacts for every new recipient of the share. It could be overwhelming to have a large amount of contacts in the account. To address this, we would recommend to configure automatic deletion of contacts that would allow you to filter out inactive, outdated or otherwise unnecessary contacts without having to remove them manually.
You can configure automatic contact deletion on the Automations → Internal Workflows → Delete Contacts sub-tab.
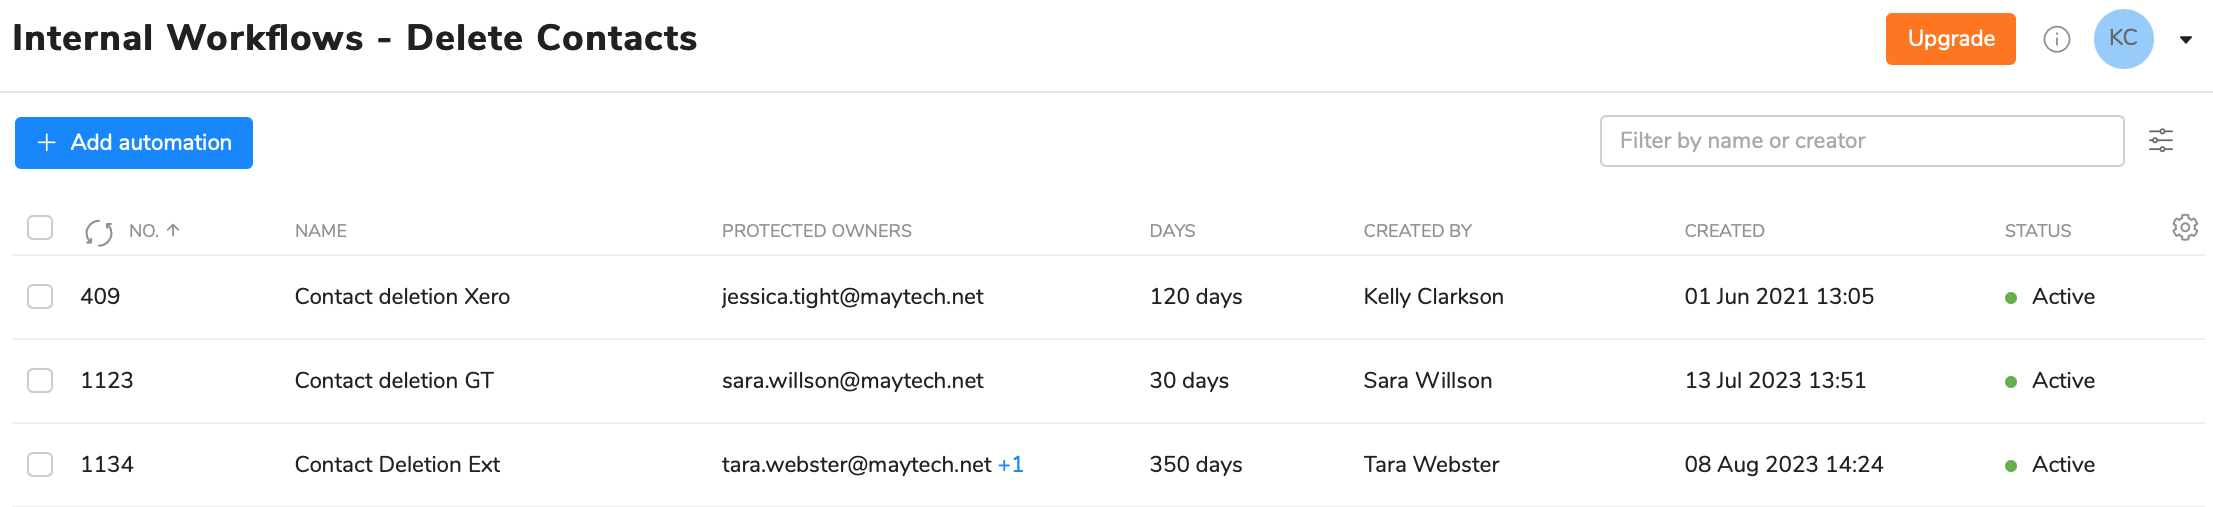
- Open Delete Contacts sub-tab of the Internal Workflows sub-tab.
- Click on the Add automation button and specify your desired settings for the deletion:
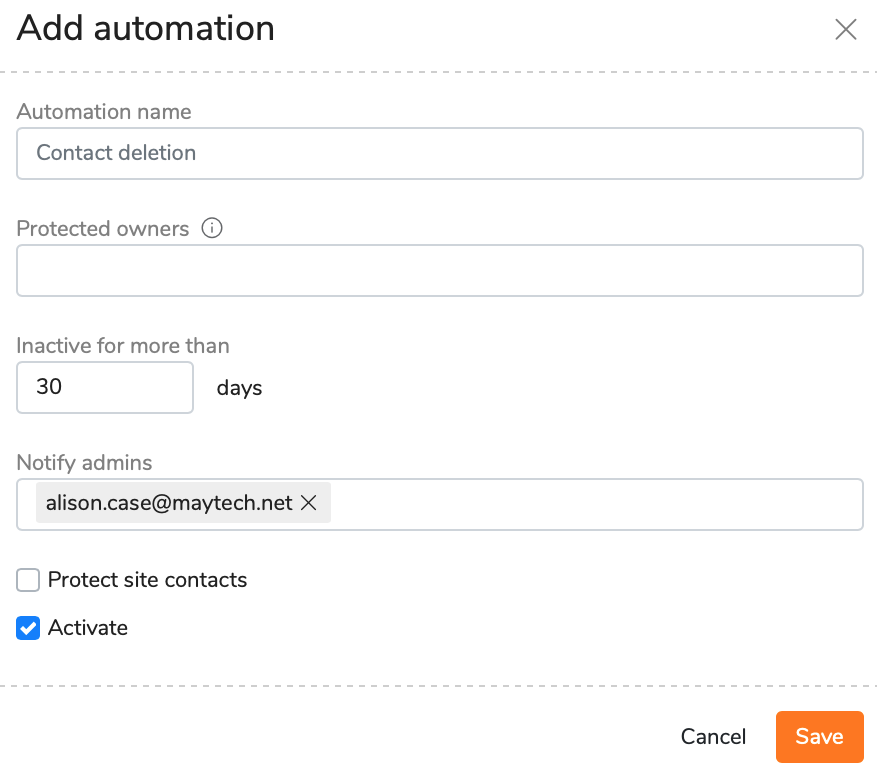
- Automation name - specify an appropriate name for the automation rule;
- Protected owners - users which contacts won't be deleted;
- Inactive for more than .. days - number of days for which contacts have to be inactive;
- Notify admins - emails of admins for notifications of deletion;
- Protect site contacts - allows you to skip site contacts in the process of deletion;
- Activate - tick if you would like to activate the rule.
- Click Save
Automatic generation of activity exports
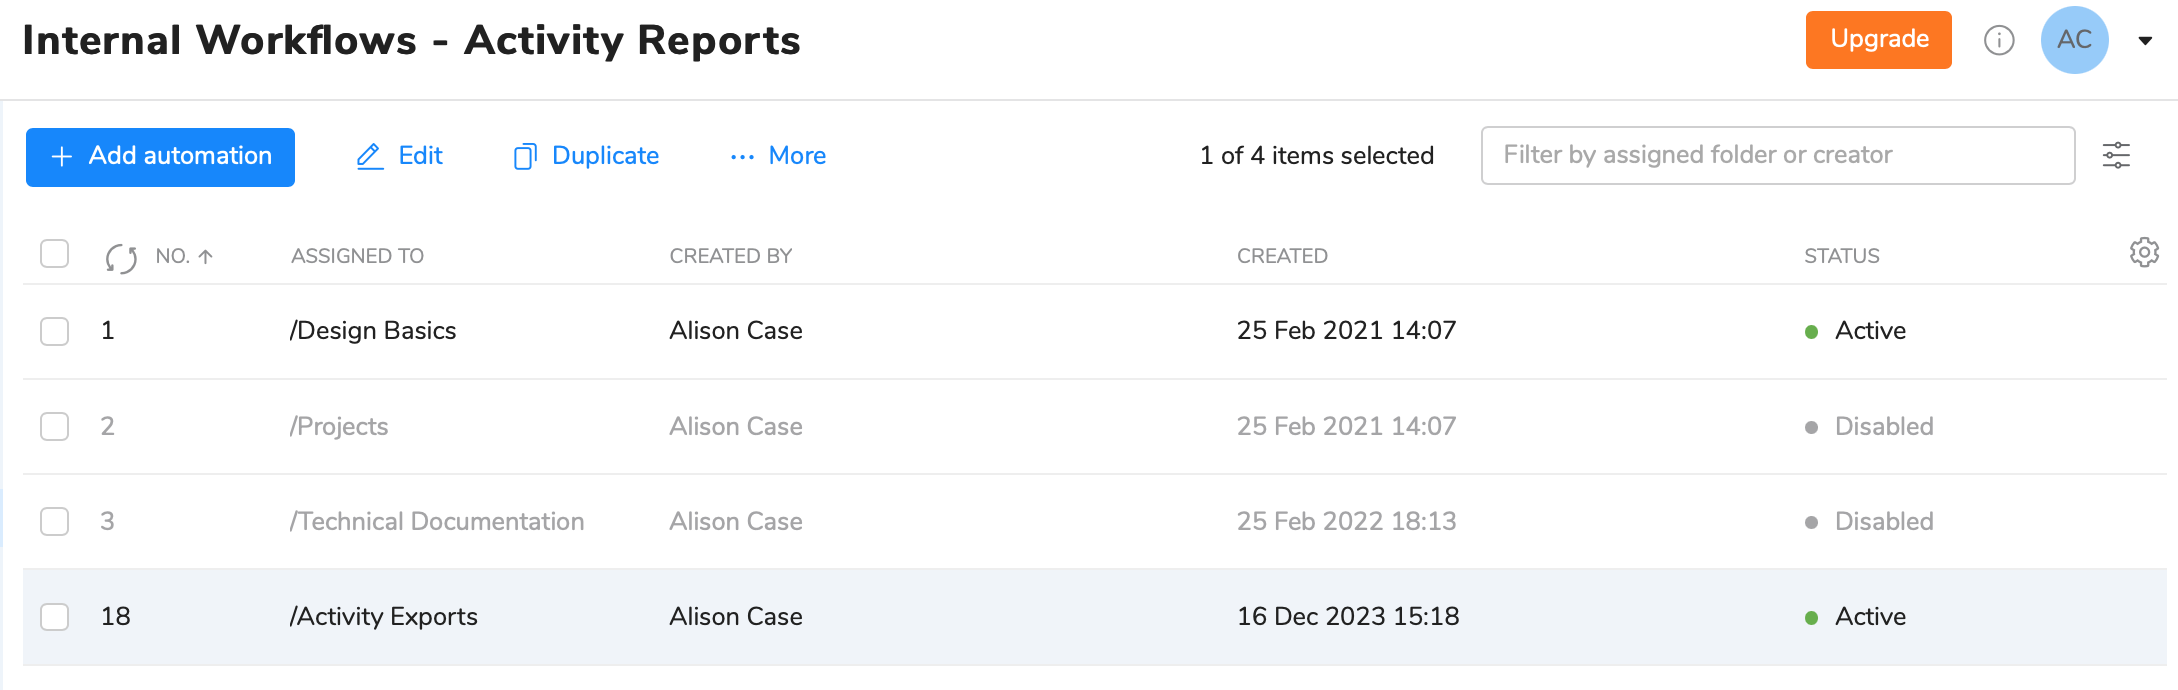
Generate Activity Reports sub-tab provides a possibility to automatically receive logs in CSV format (a comma-separated values file that allows data to be saved in a tabular format) with the account activity on a regular basis.
The automation rules created by the owners cannot be updated or deleted by the administrators.
To add a rule, follow the steps below:
- Open Generate Activity Reports sub-tab on the Internal Workflows sub-tab.
- Click on the Add automation button and adjust settings for the rule:
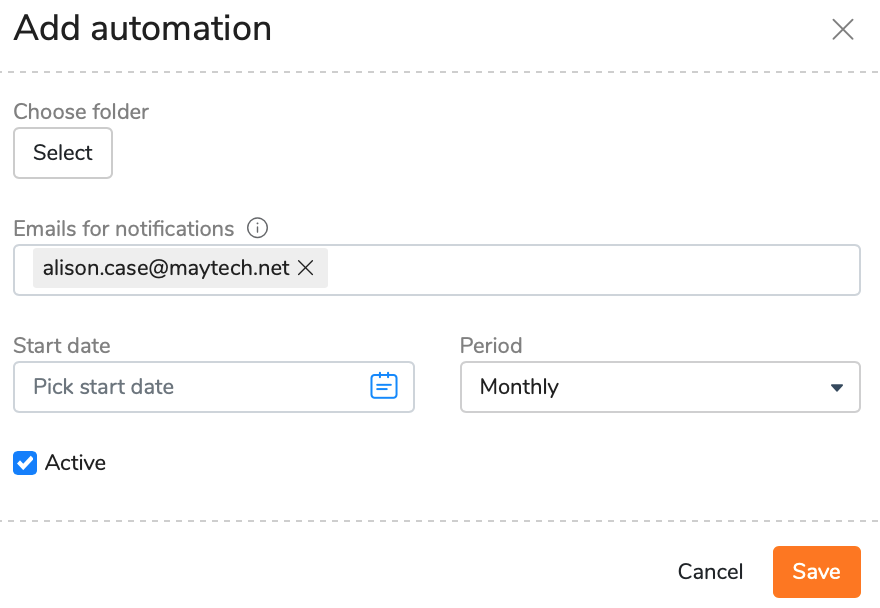
- Choose folder - select the folder where you would like to store your activity logs;
- Emails for notifications - type in emails for automatic activity log notifications;
- Start date - pick the start date for the generation of future logs;
- Period - choose the frequency of report creation: daily, weekly or monthly.
- Active - tick if you would like to activate the rule.
- Save the rule.
The logs will be stored in your specified folder in CSV format and sent to the listed recipients in the email notifications.
If you would like to retrieve a log for the past period, go to the Activity Log tab and manually generate a report there. In order to save your time in future, adjust the rule with the above instructions and receive required logs with the specified frequency.